
🔥 Read this trending post from Hacker News 📖
📂 **Category**:
📌 **What You’ll Learn**:
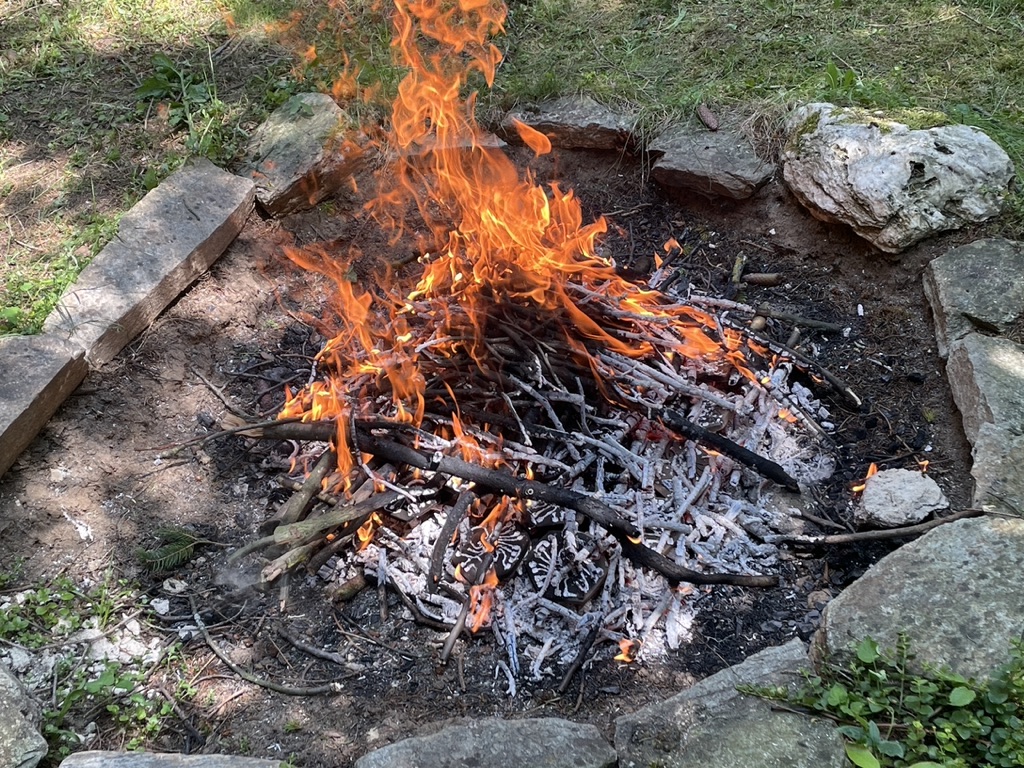
It was when we were struggling with the question of how to manufacture clay in low-energy and low-impact ways that we came across the work of Heinz Lackinger, a
pottery crafter in Donnerskirchen, Burgenland, Austria, who works with prehistoric
techniques of firing clay in an open wood fire. Instead of using sophisticated machines,
he uses a simple hole in the grounds of his 18th-century house. We had the privilege of
spending two days with this skilled craftsman, learning how to identify and collect the
clay, and how to model and fire it using old, dry branches collected from the forest
ground. If the clay is collected with awareness of its many qualities, and in small
quantities only, this process can be defined as 100% fair trade and congruent with
locally sourced modes of hardware production. We owe the knowledge required for the
following steps to Heinz Lackinger’s generous knowledge transfer during his
workshop, and to our own experiments later applying this technique in the making of
natural clay PCB boards.
gently down on the clay, facing the 3D printed side down towards the clay. It is
important to apply some force, but quite gently, until the circuit is imprinted in the
clay. In this process you force the clay to deform a little at the edges, but you can
easily remove the excess material by sanding it after drying. Another technique is to
place the !stamp‘ inside the tile cutter and cut and imprint at the same time. We
observed that this also works fine. However, it is difficult to check the quality of the
imprint while pressing the cutter down. Also, the circuit tracks will be thinner, which
might make the painting process a little more difficult.
We usually let the boards dry naturally outdoors for 24 hours before painting, but
this time frame is weather-dependent. If you have more time between modelling and
firing the clay, you will ideally dry the boards indoors for one to two weeks,
positioned between wooden plates and applying some weight to the top plate. In this way they will not deform while drying and will maintain their flat surfaces (we
recommend using newspaper between the boards and the wood). If you want to dry
the boards quickly, you can also place them around a wood fire. It is important to
avoid temperature clashes during drying so it is best to bring them to the fire as
slowly as possible, one step at a time.
You will know when a board is 100% dry when you see its colour becoming lighter and
more even. When it is not completely dry, although the edges turn a lighter colour, in
the middle the clay is darker and wet. Our experience tells us that this is the minimum
drying period required before starting to paint the circuits. If you wish, you can
facilitate the painting process by gently sanding the boards, using a 120# or finer
sanding paper. After sanding, make sure there is no dust on the board so you can
start painting it.
Painting the circuit
While searching for conductive materials that can be used in ceramics, we came
across a gold lustre (used often for the gold details on porcelain) that, after firing,
becomes conductive. The first problem we encountered was that this product is
usually sold by ceramic shops that don”t supply any information about its ingredients,
especially on the sources of the gold and its commodity chain. The second problem is
that it is not possible to solder directly on this gold lustre, so we had to add another
precious metal to the equation. The challenge was finding – within the solderable and
easily available precious metals, such as tin, copper, brass and silver – one that
could bear the firing process, which is c. 700 oC, and at the same time maintain its
conductive properties. As we know, tin, which is mostly used for soldering, melts at a
very low temperature, copper melts at approximately 1000 oC, but the oxidation
process happens so quickly in the fire that it loses its conductive properties, and the
same happens with brass. We were left with silver, which, although it also oxidises
with the fire, maintains its conductive properties. Also, silver is cheaper than gold and
widely used by goldsmiths. We were able to find a silver paint, commercialised by a
German company, that is made with waste silver powder collected by jewellery
makers. It’s like an urban mining technique of silver dust.
Concept and Design: Patrícia J. Reis & Stefanie Wuschitz
PCB Design: Patrícia J. Reis & Daniel Schatzmayr
3D Printing: Klemens Kohlweis
Clay research: Patrícia J. Reis
💬 **What’s your take?**
Share your thoughts in the comments below!
#️⃣ **#Clay #PCB #Tutorial #feministhackerspaces**
🕒 **Posted on**: 1777220048
🌟 **Want more?** Click here for more info! 🌟