✨ Read this insightful post from Hacker News 📖
📂 **Category**:
💡 **What You’ll Learn**:
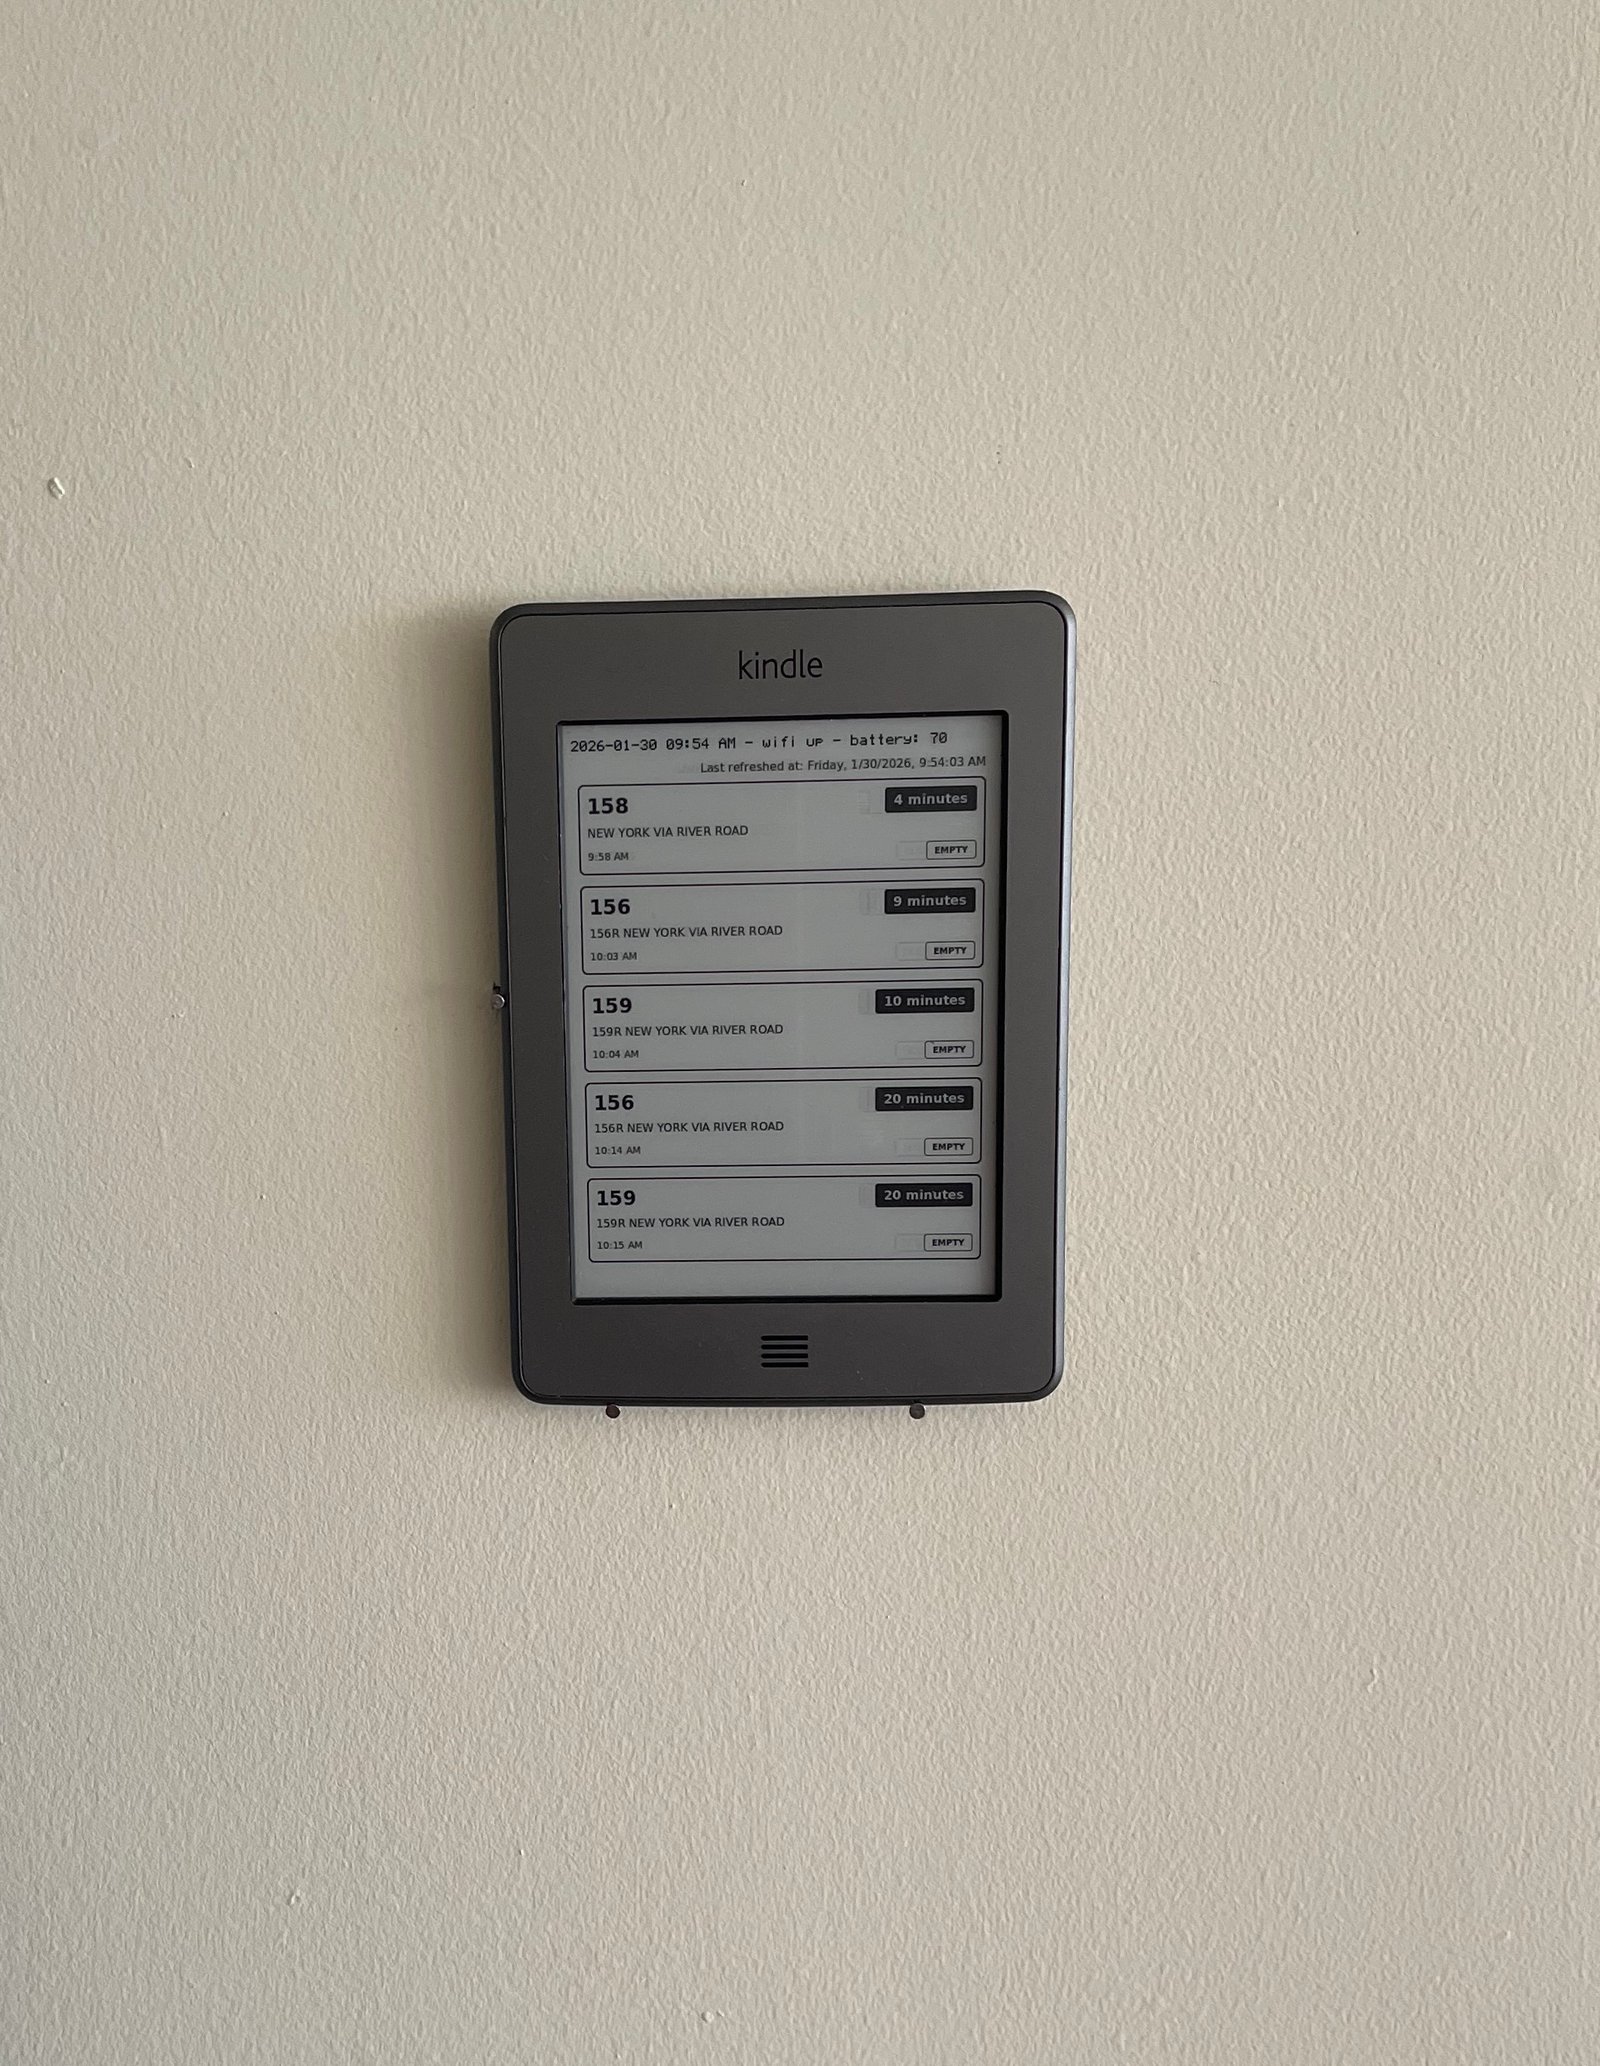
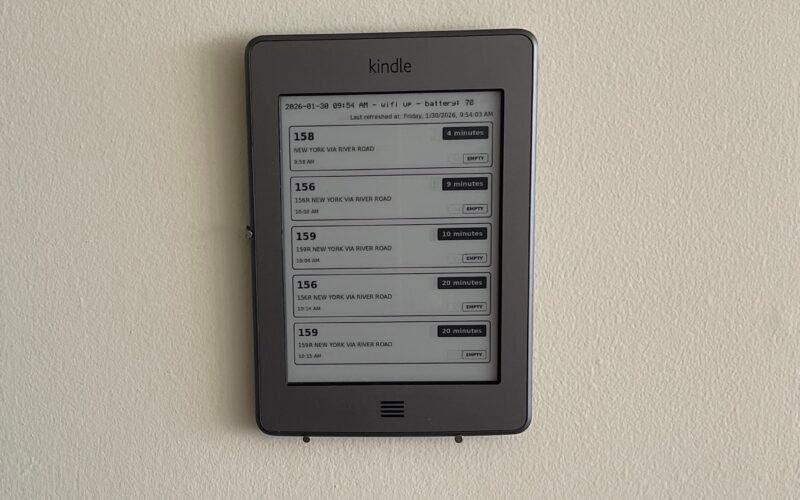
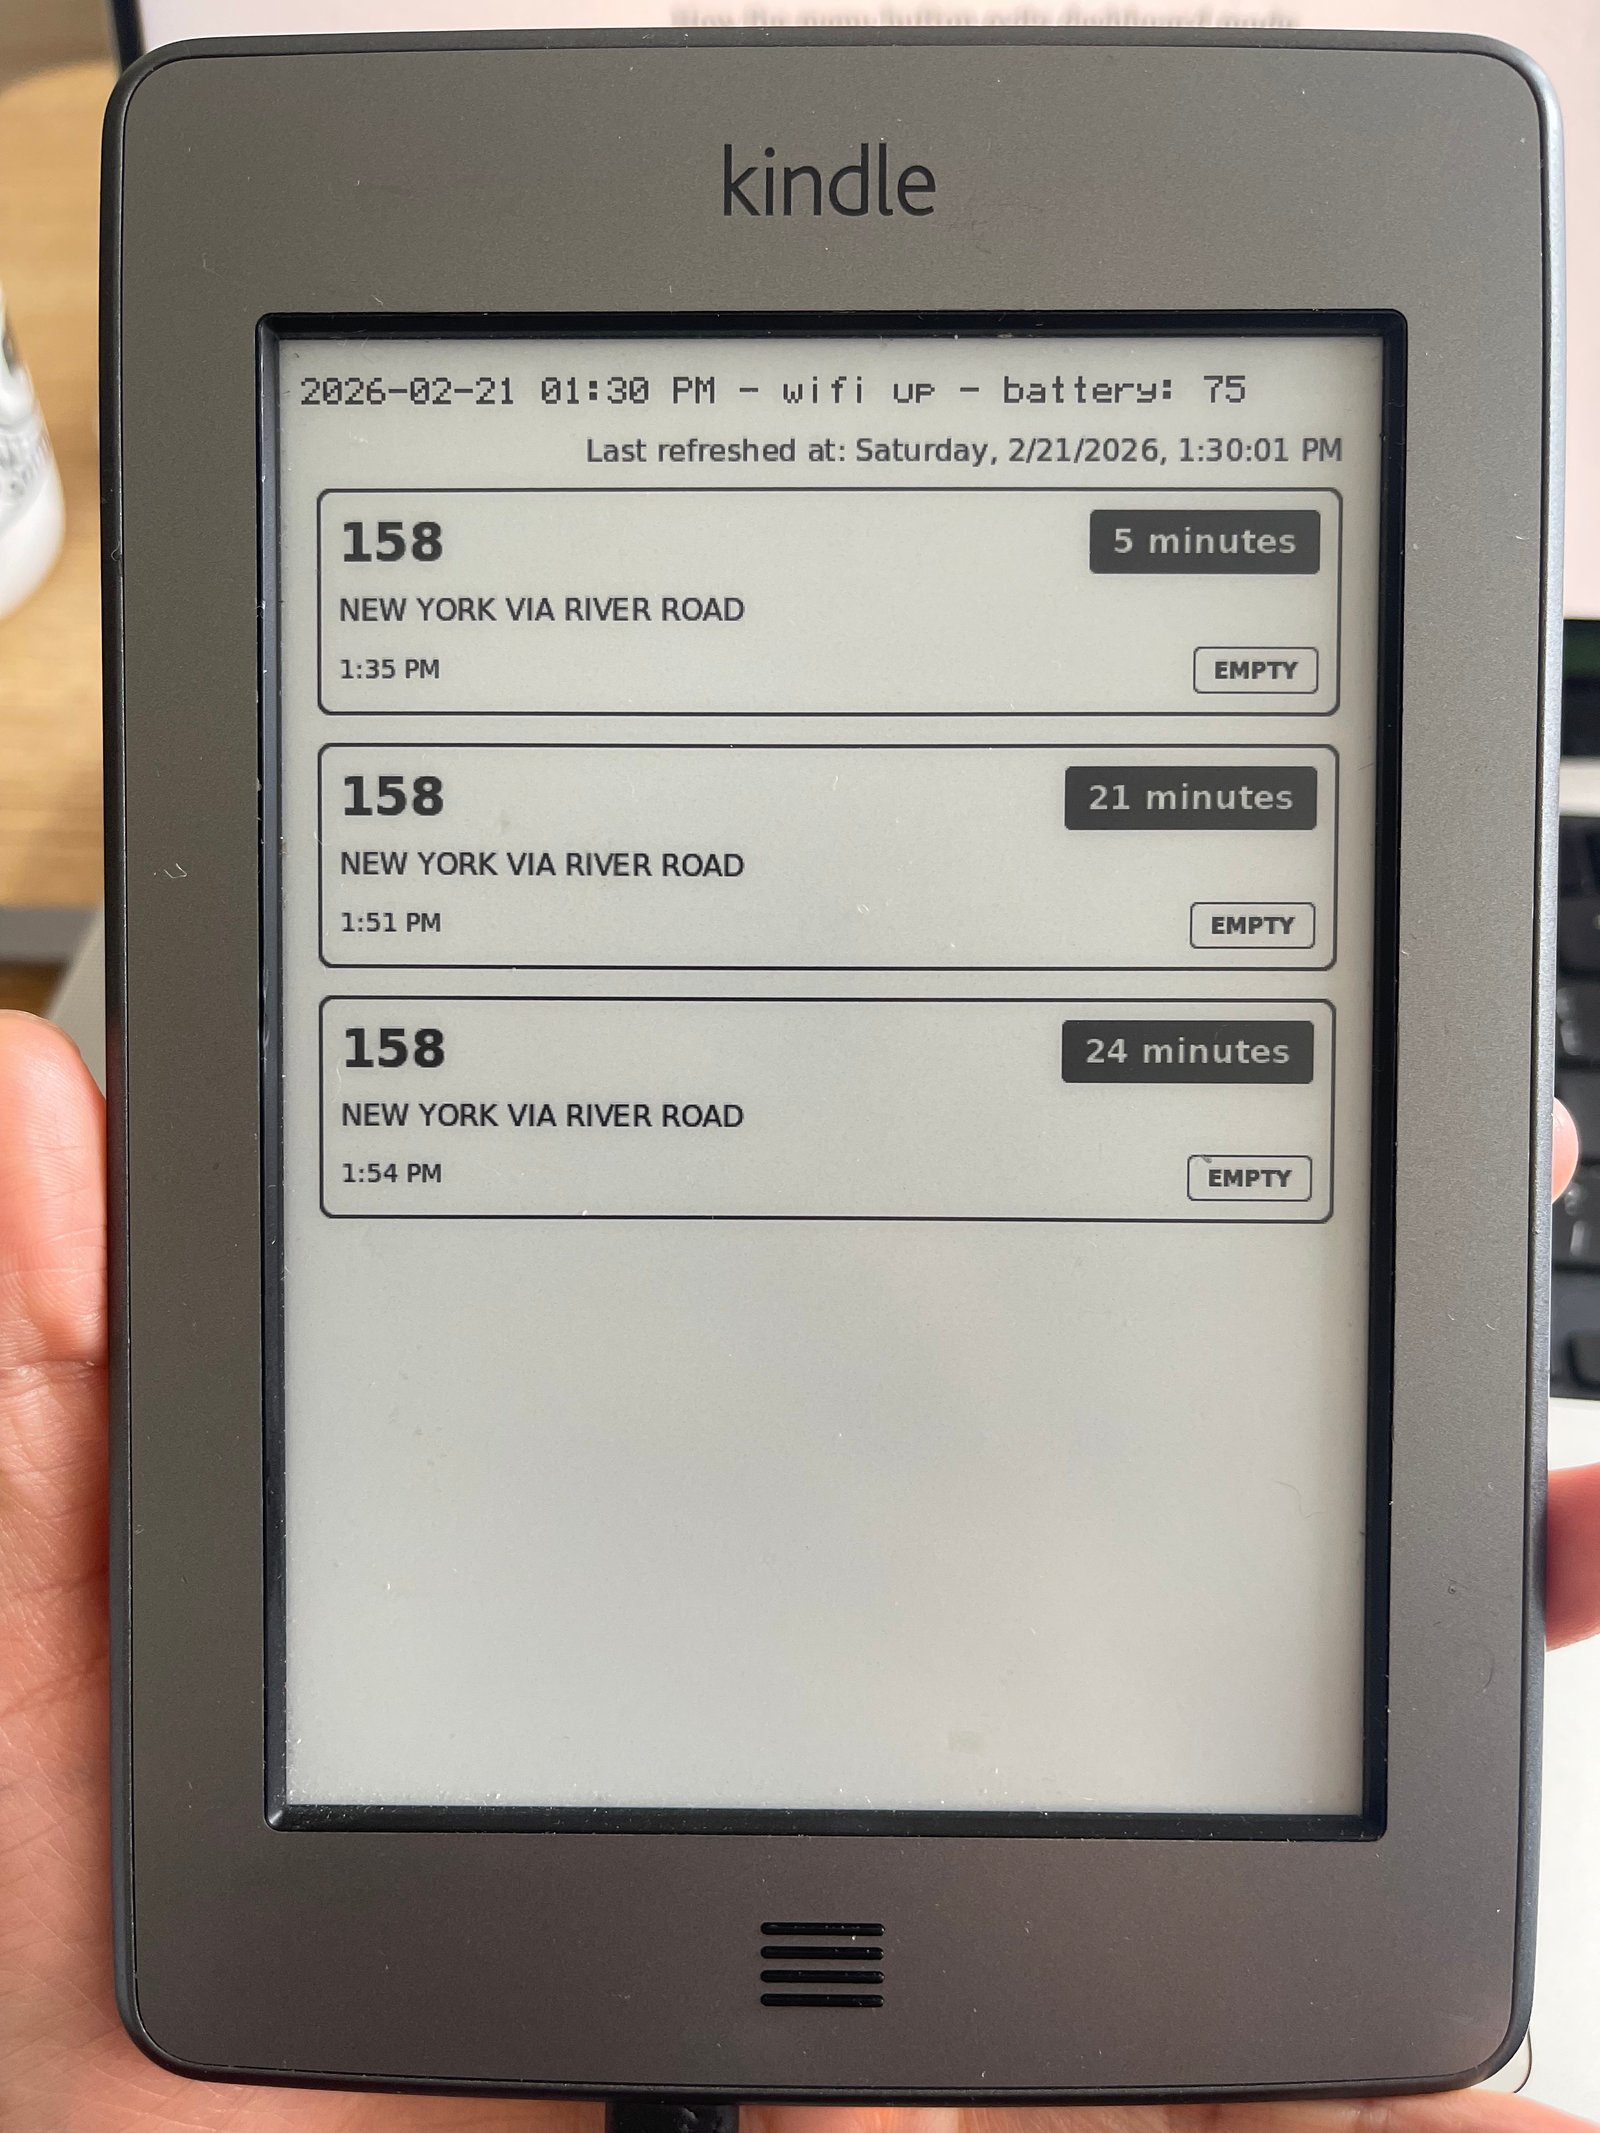
This is how I turned an old Kindle (Kindle Touch 4th Generation/K5/KT) into a live bus feed that refreshes every minute with the option to exit out of dashboard mode by pressing the menu button. It’s basically TRMNL without the $140 price tag.
The high level steps are:
- Jailbreak your kindle
- Install KUAL & MRPI
- Setup SSH
- Run a server accessible over the internet (or locally) that serves the Kindle image
- Create a KUAL app
1. Jailbreaking your Kindle
This will be your Kindle hacking bible for steps 1 – 3. You need to figure out what version of Kindle you have, its firmware version (shorthand FW in the Kindle forum guides + readmes), download the appropriate tar file and follow jailbreak instructions.
Once you’ve successfully jailbroken your Kindle, it’s time to install some things.
2. Installing KUAL & MRPI
KUAL is a custom Kindle app launcher. MRPI allows us to install custom apps onto the Kindle (you may not need MRPI if you have a newer Kindle). This part was frustrating – reading through forum threads gives me a headache. The most helpful resource I found was the Kindle modding wiki. Maybe other people aren’t as oblivious as me but it took me half a day to realize that the “next step” in each guide can be accessed by clicking the “Next Step” button at the bottom of the page.

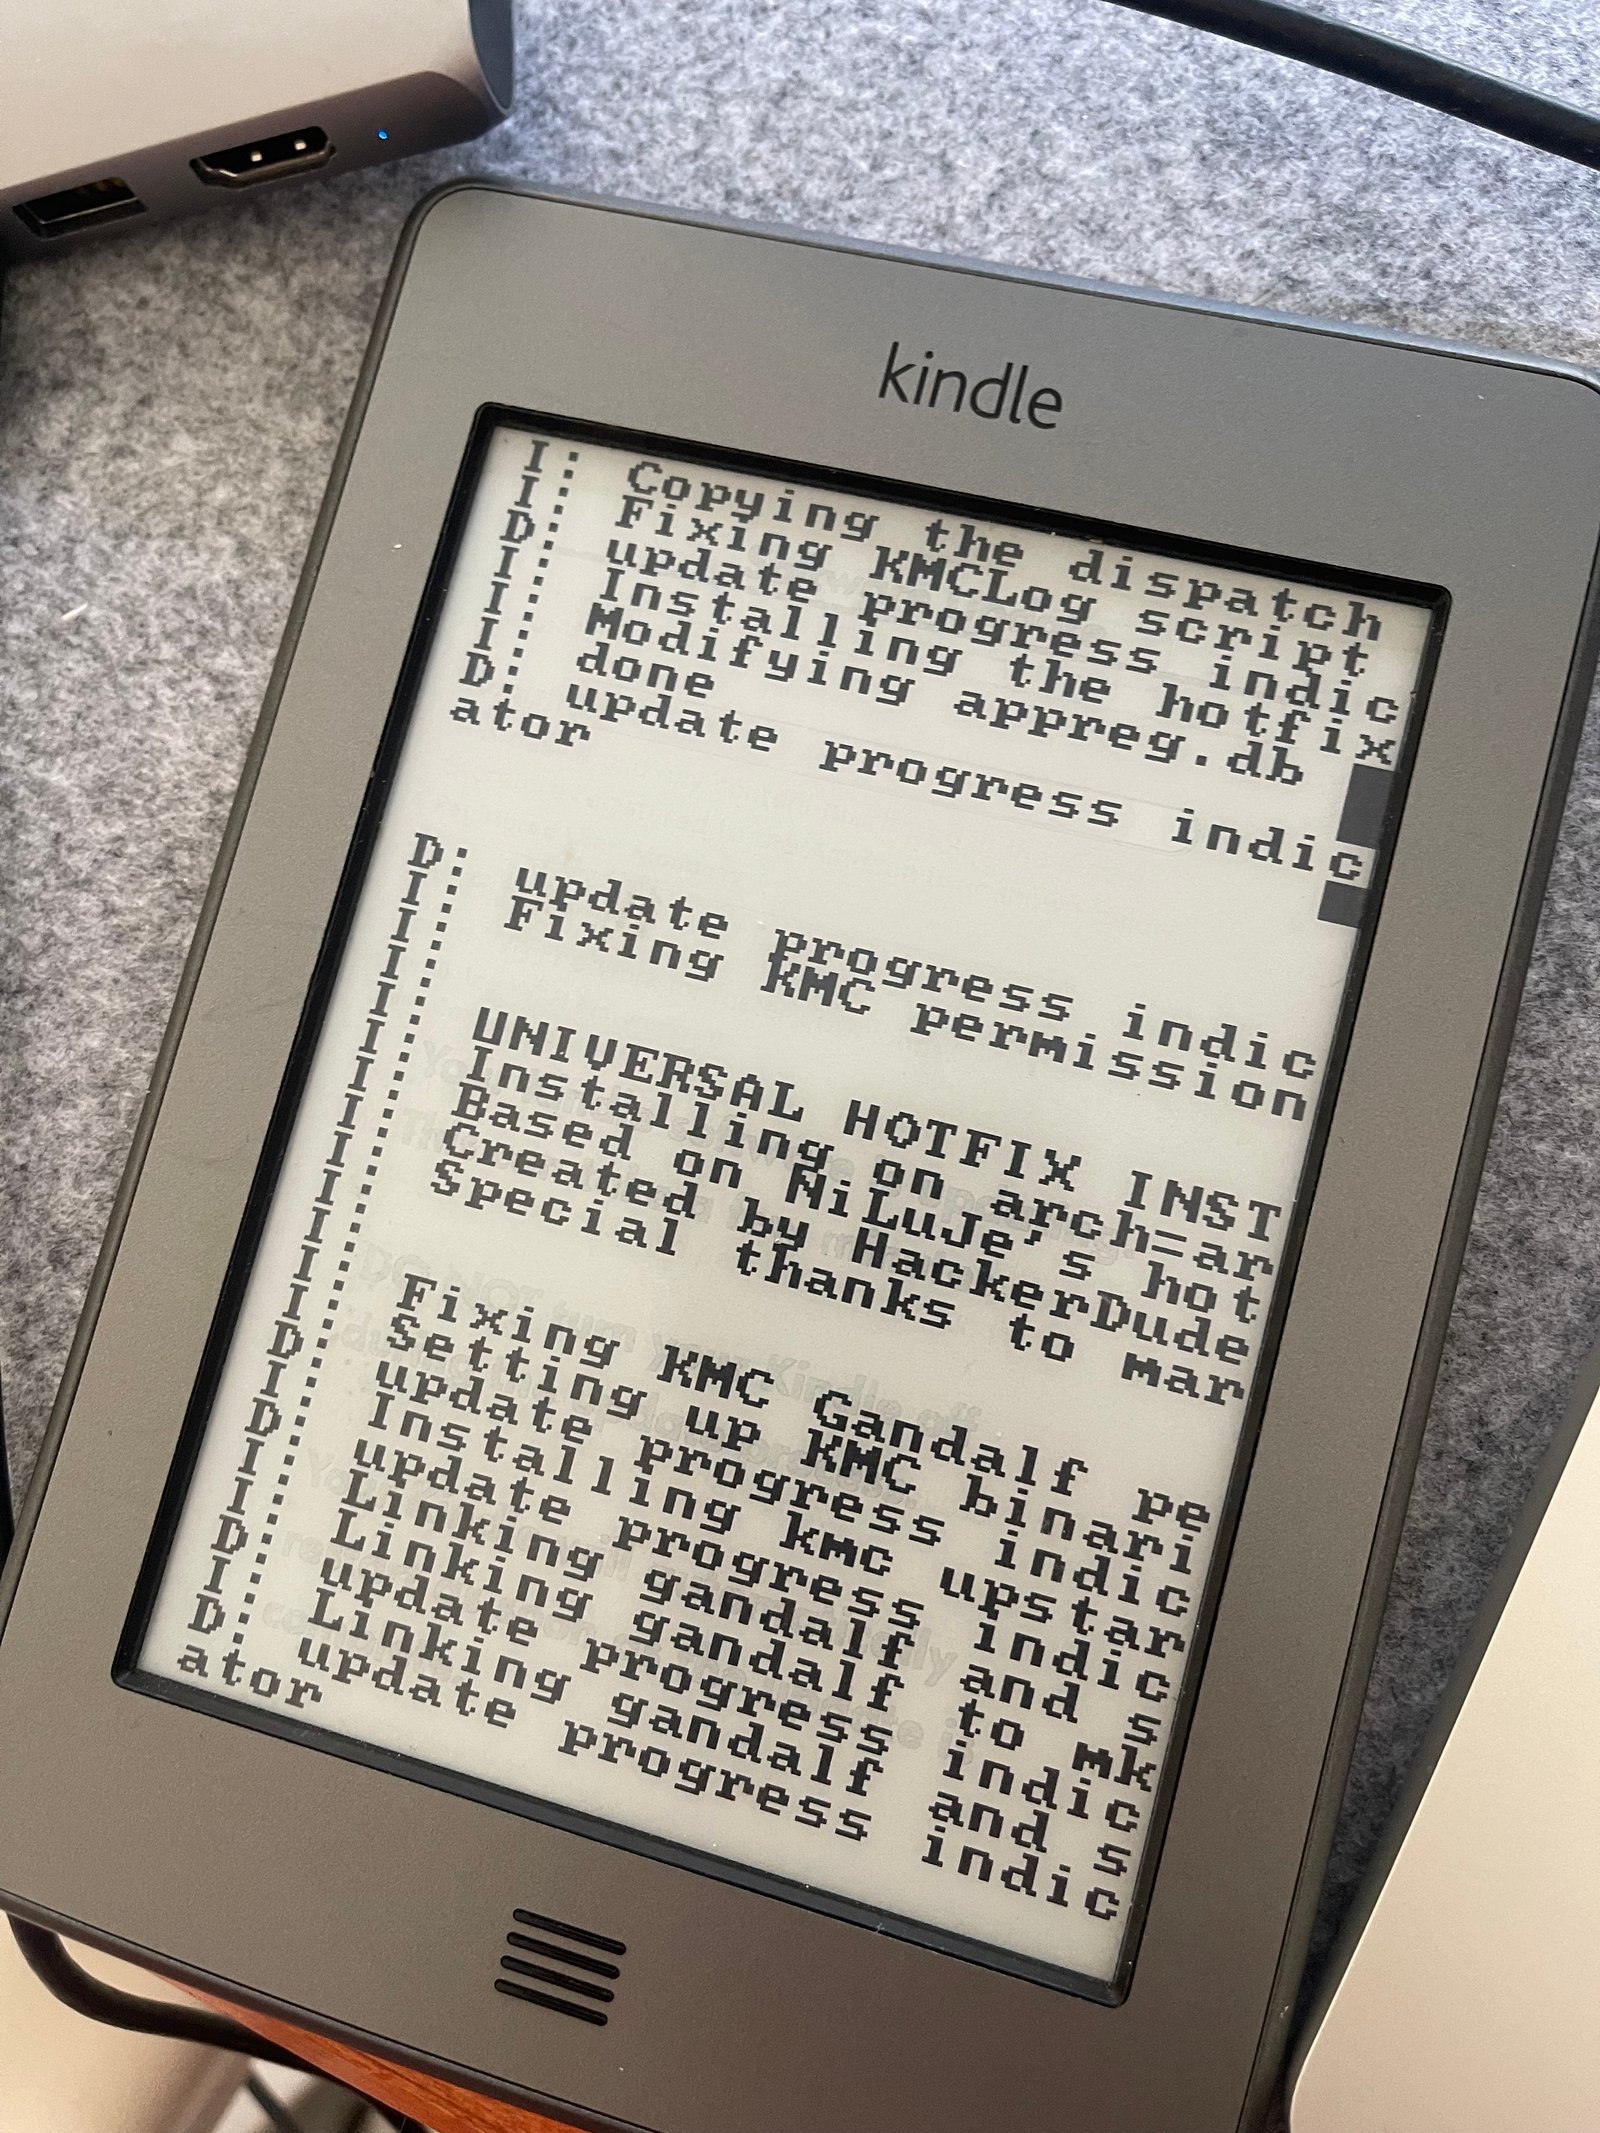
A gotcha for me was that I had to follow the Setting up a Hotfix guide before attempting to install KUAL & MRPI.
After successfully installing KUAL & MRPI, I also Disabled OTA Updates because why not. I didn’t follow any other guides in the Kindle Modding wiki after disabling OTA Updates because they didn’t seem relevant.
3. Setup SSH for your Kindle
This can be done with a KUAL extension called USBNetwork (downloadable from the Kindle hacking bible) that will allow you to SSH onto your Kindle as if it were a regular server.
However, nowhere in the forums could I find any information about how to actually install a KUAL extension using MRPI. Finally, this helpful blogpost on setting up SSH for Kindle came to the rescue. I followed the steps that explained to how to install the extension and how to setup SSH via USB. I ignored the rest of the instructions on the page because I’m not concerned about adding a password to the Kindle or setting up SSH over wifi.
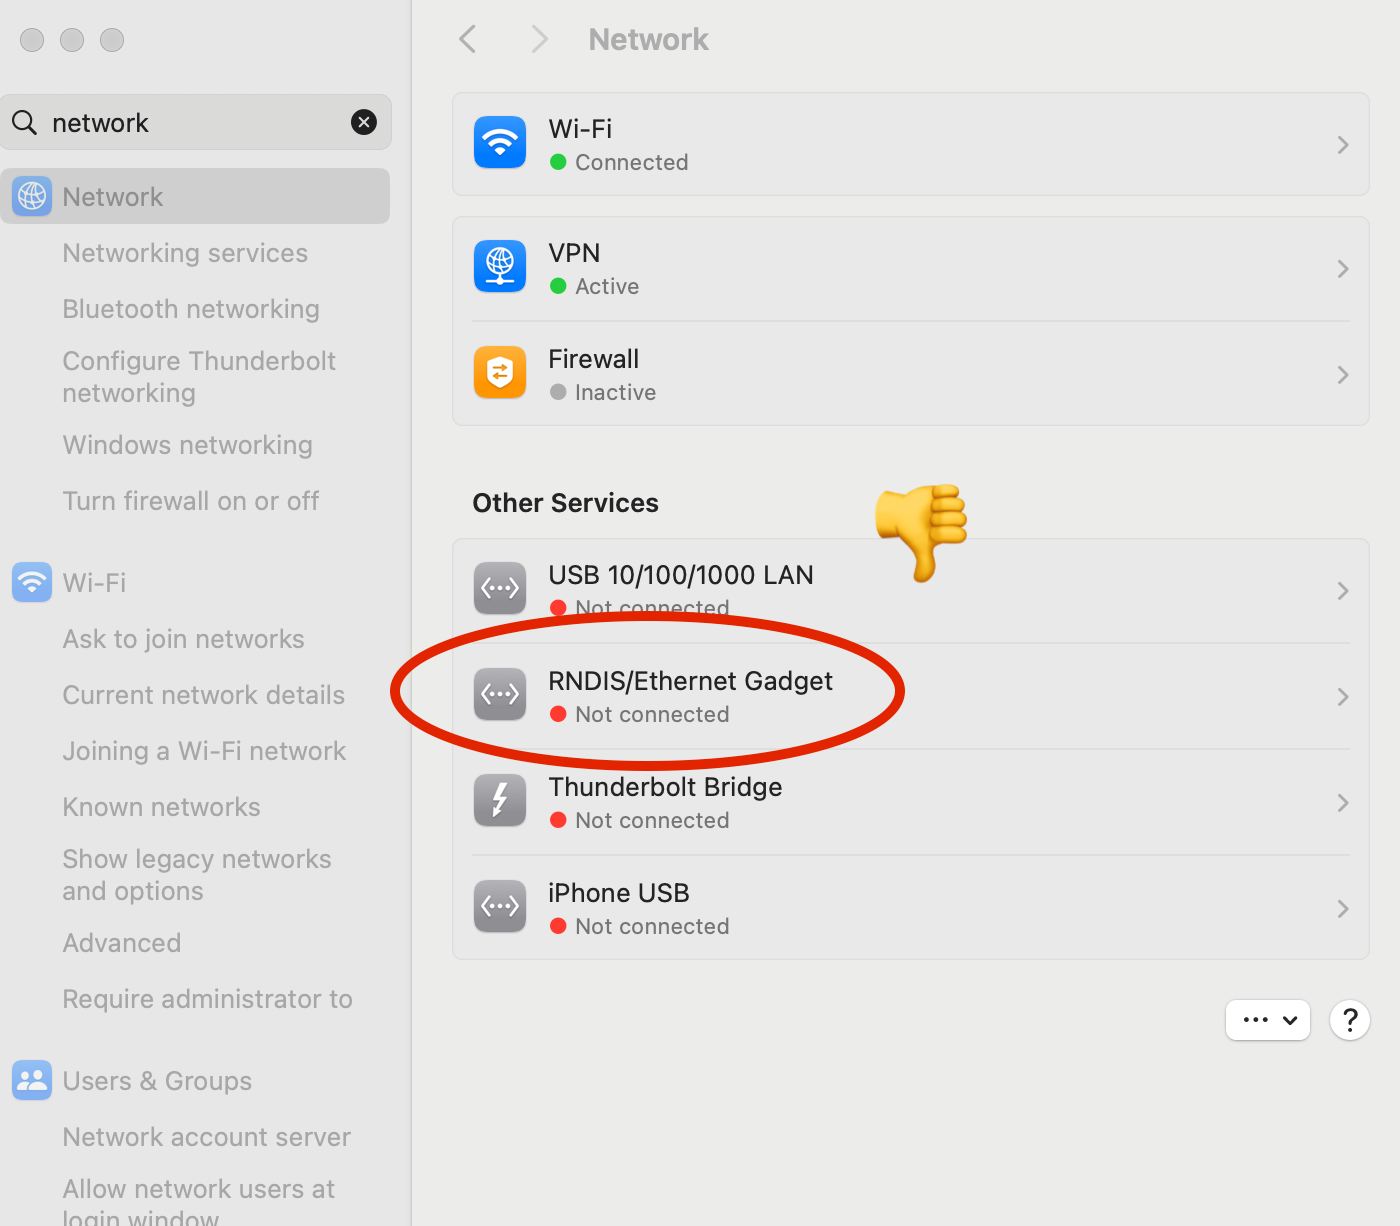
If you’ve setup SSH successfully, when the Kindle is plugged in, your computer’s network tab should have a new item in ‘Connected’ mode:
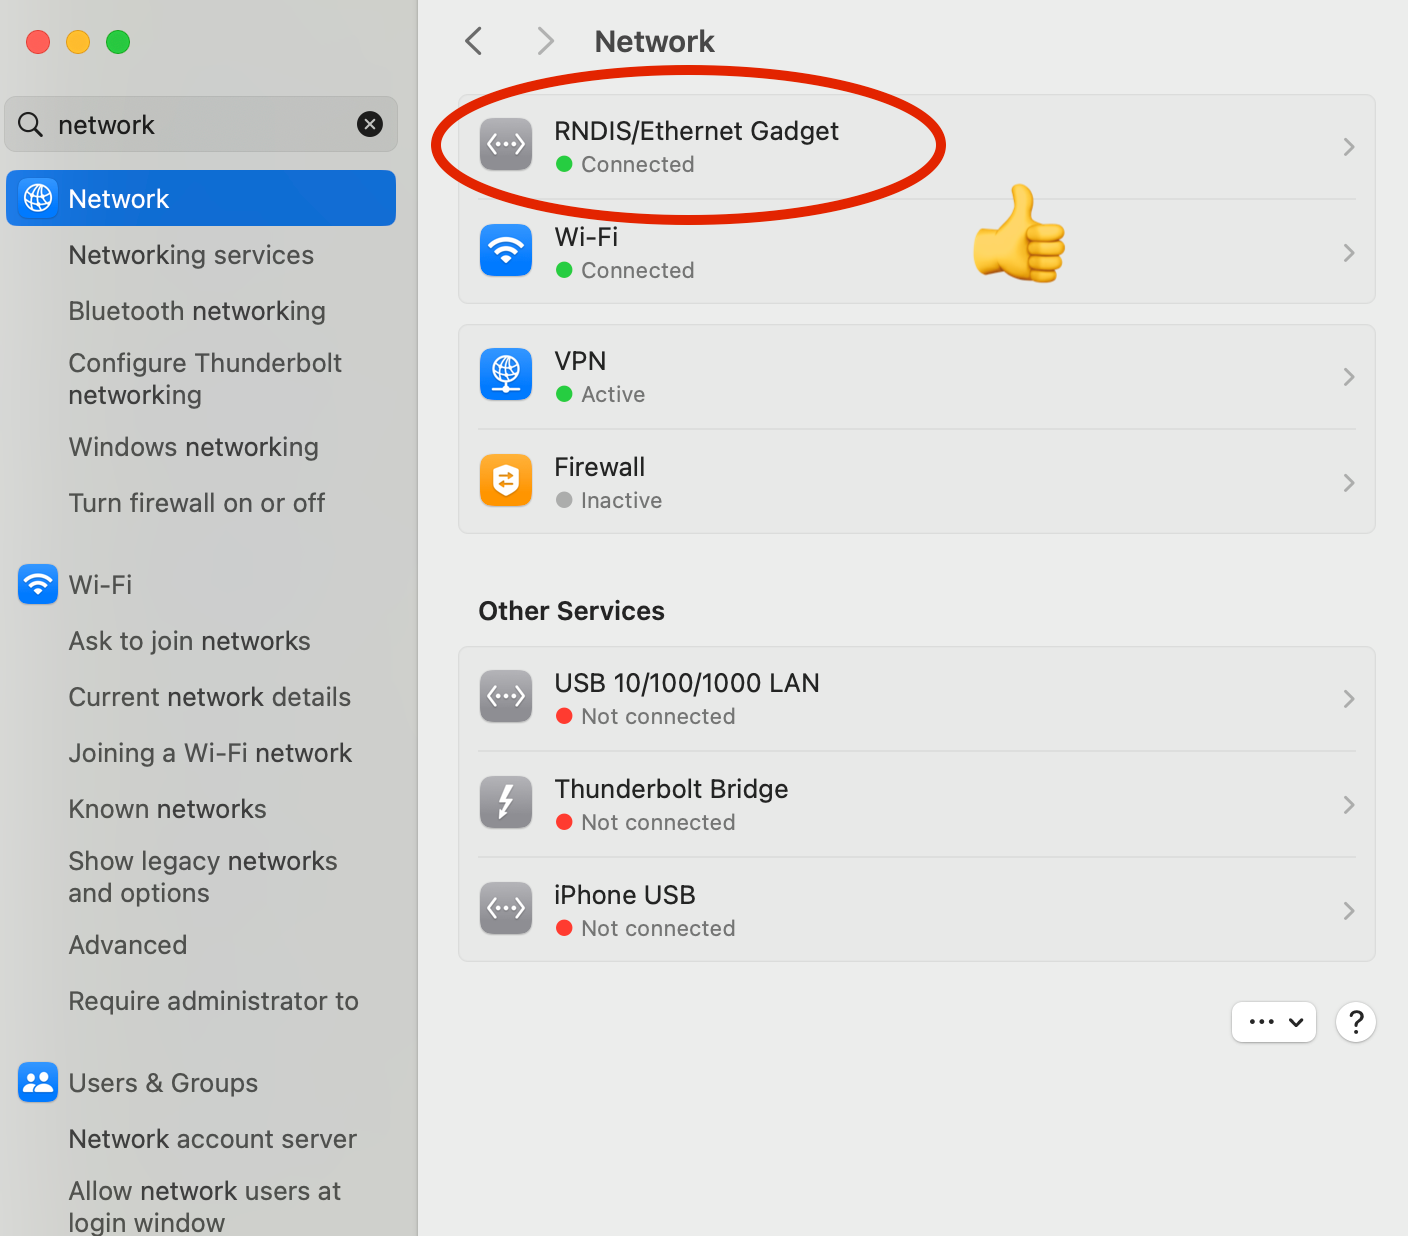
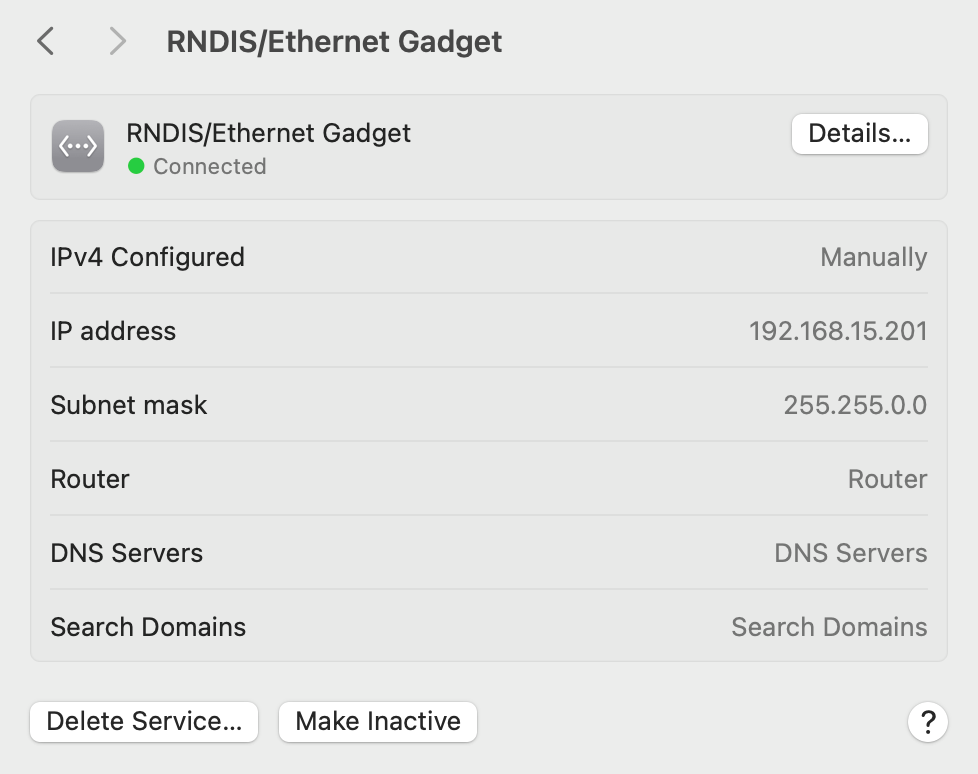
Here’s what my successfully connected Kindle looks like in the network settings tab:
Congratulations! Your Kindle is now ready to run custom code.
4. Running a server that generates an image for the Kindle
How displaying custom data on the Kindle works is that we need to create a png that fits the Kindle resolution, then draw the image onto the Kindle itself.
Since I live in New Jersey, I wanted to display NJTransit bus times on my Kindle. Luckily, NJTransit has a public GraphQL server that returns bus arrival times for any stop number.
Pulling NJ Transit bus data
After poking around in the network tab of the NJ Transit Bus Website, I found this GraphQL query that returns the bus number, arrival time, current capacity, destination, and departing time in minutes:
query BusArrivalsByStopID($stopID: ID!) echo '?')"
If you’re also a Jersey girl, you can run the following curl to get upcoming bus times (don’t forget to replace YOUR_STOP_NUMBER):
curl 'https://www.njtransit.com/api/graphql/graphql' \
  -H 'accept: */*' \
  -H 'accept-language: en-US,en;q=0.9' \
  -H 'cache-control: no-cache' \
  -H 'content-type: application/json' \
  -H 'pragma: no-cache' \
  -H 'priority: u=1, i' \
  --data-raw $' echo '?')"
'
Creating a server
In the majority of the guides I read during this process (two most helpful being Matt Healy’s Kindle Dashboard guide and Hemant’s Kindle Dashboard guide) they use puppeteer to convert HTML to png. This does not work for me because I’m cheap and have a single $6 Digital Ocean droplet that I use for all side projects. Every time I ran puppeteer on it the entire server shits itself.
Instead I created an endpoint that formats the bus data into HTML, then the docker container that runs the server has a cron that runs the wkhtmltoimage command to generate a new png every 3 minutes using the HTML endpoint. The server then serves the generated png file at a separate endpoint.

Here’s what the 2 relevant endpoints look like for my Kindle:
The entire server code – Dockerfile, scripts, the server itself – can be found in the server folder of my Kindle hax repo. It’s written in Node because I was originally using Puppeteer before discovering the performance issues, but it’d be a fun optimization exercise to rewrite in Go.
Generating the image
The most important thing is that the image needs to conform to your Kindle’s screen resolution. You can find what yours is by running eips -i when SSH-ed into the Kindle. eips is the command you’ll be using to display an image on your Kindle. I found this eips menu guide helpful
You’ll see an output like this:
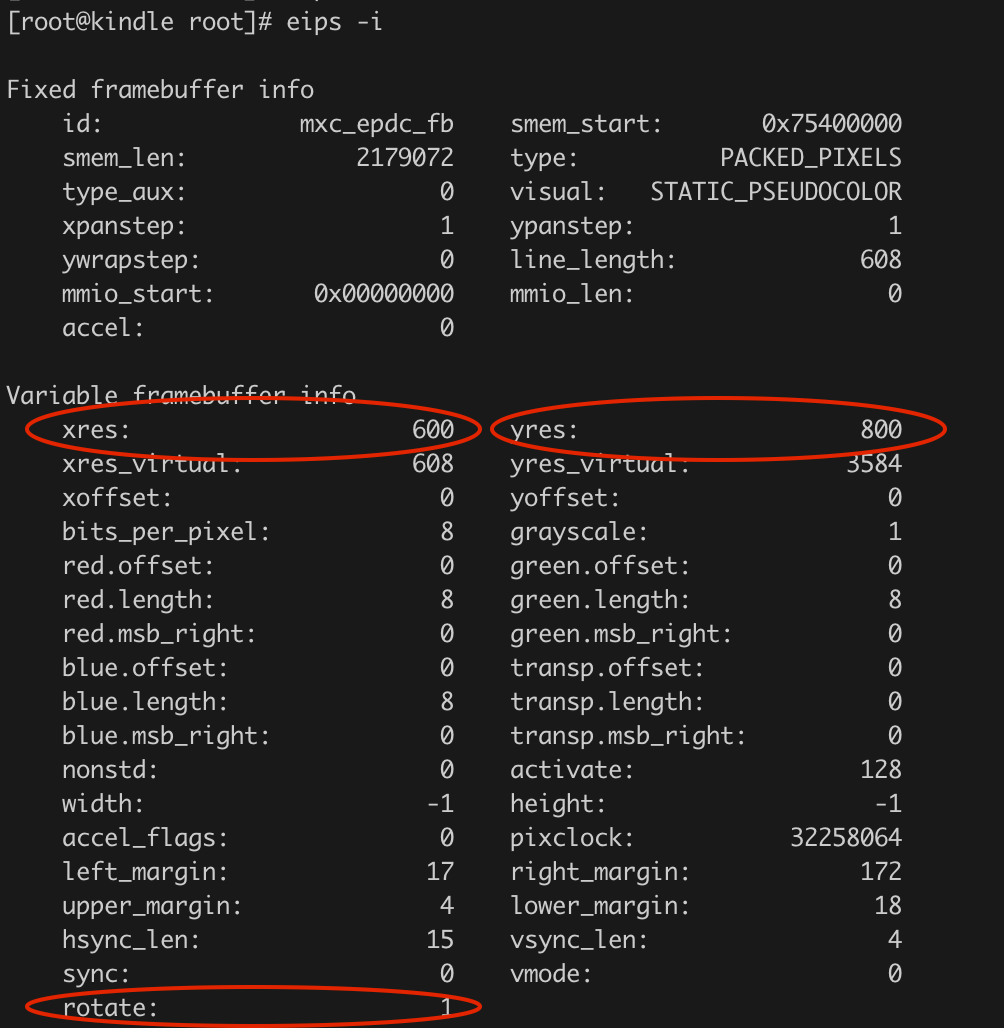
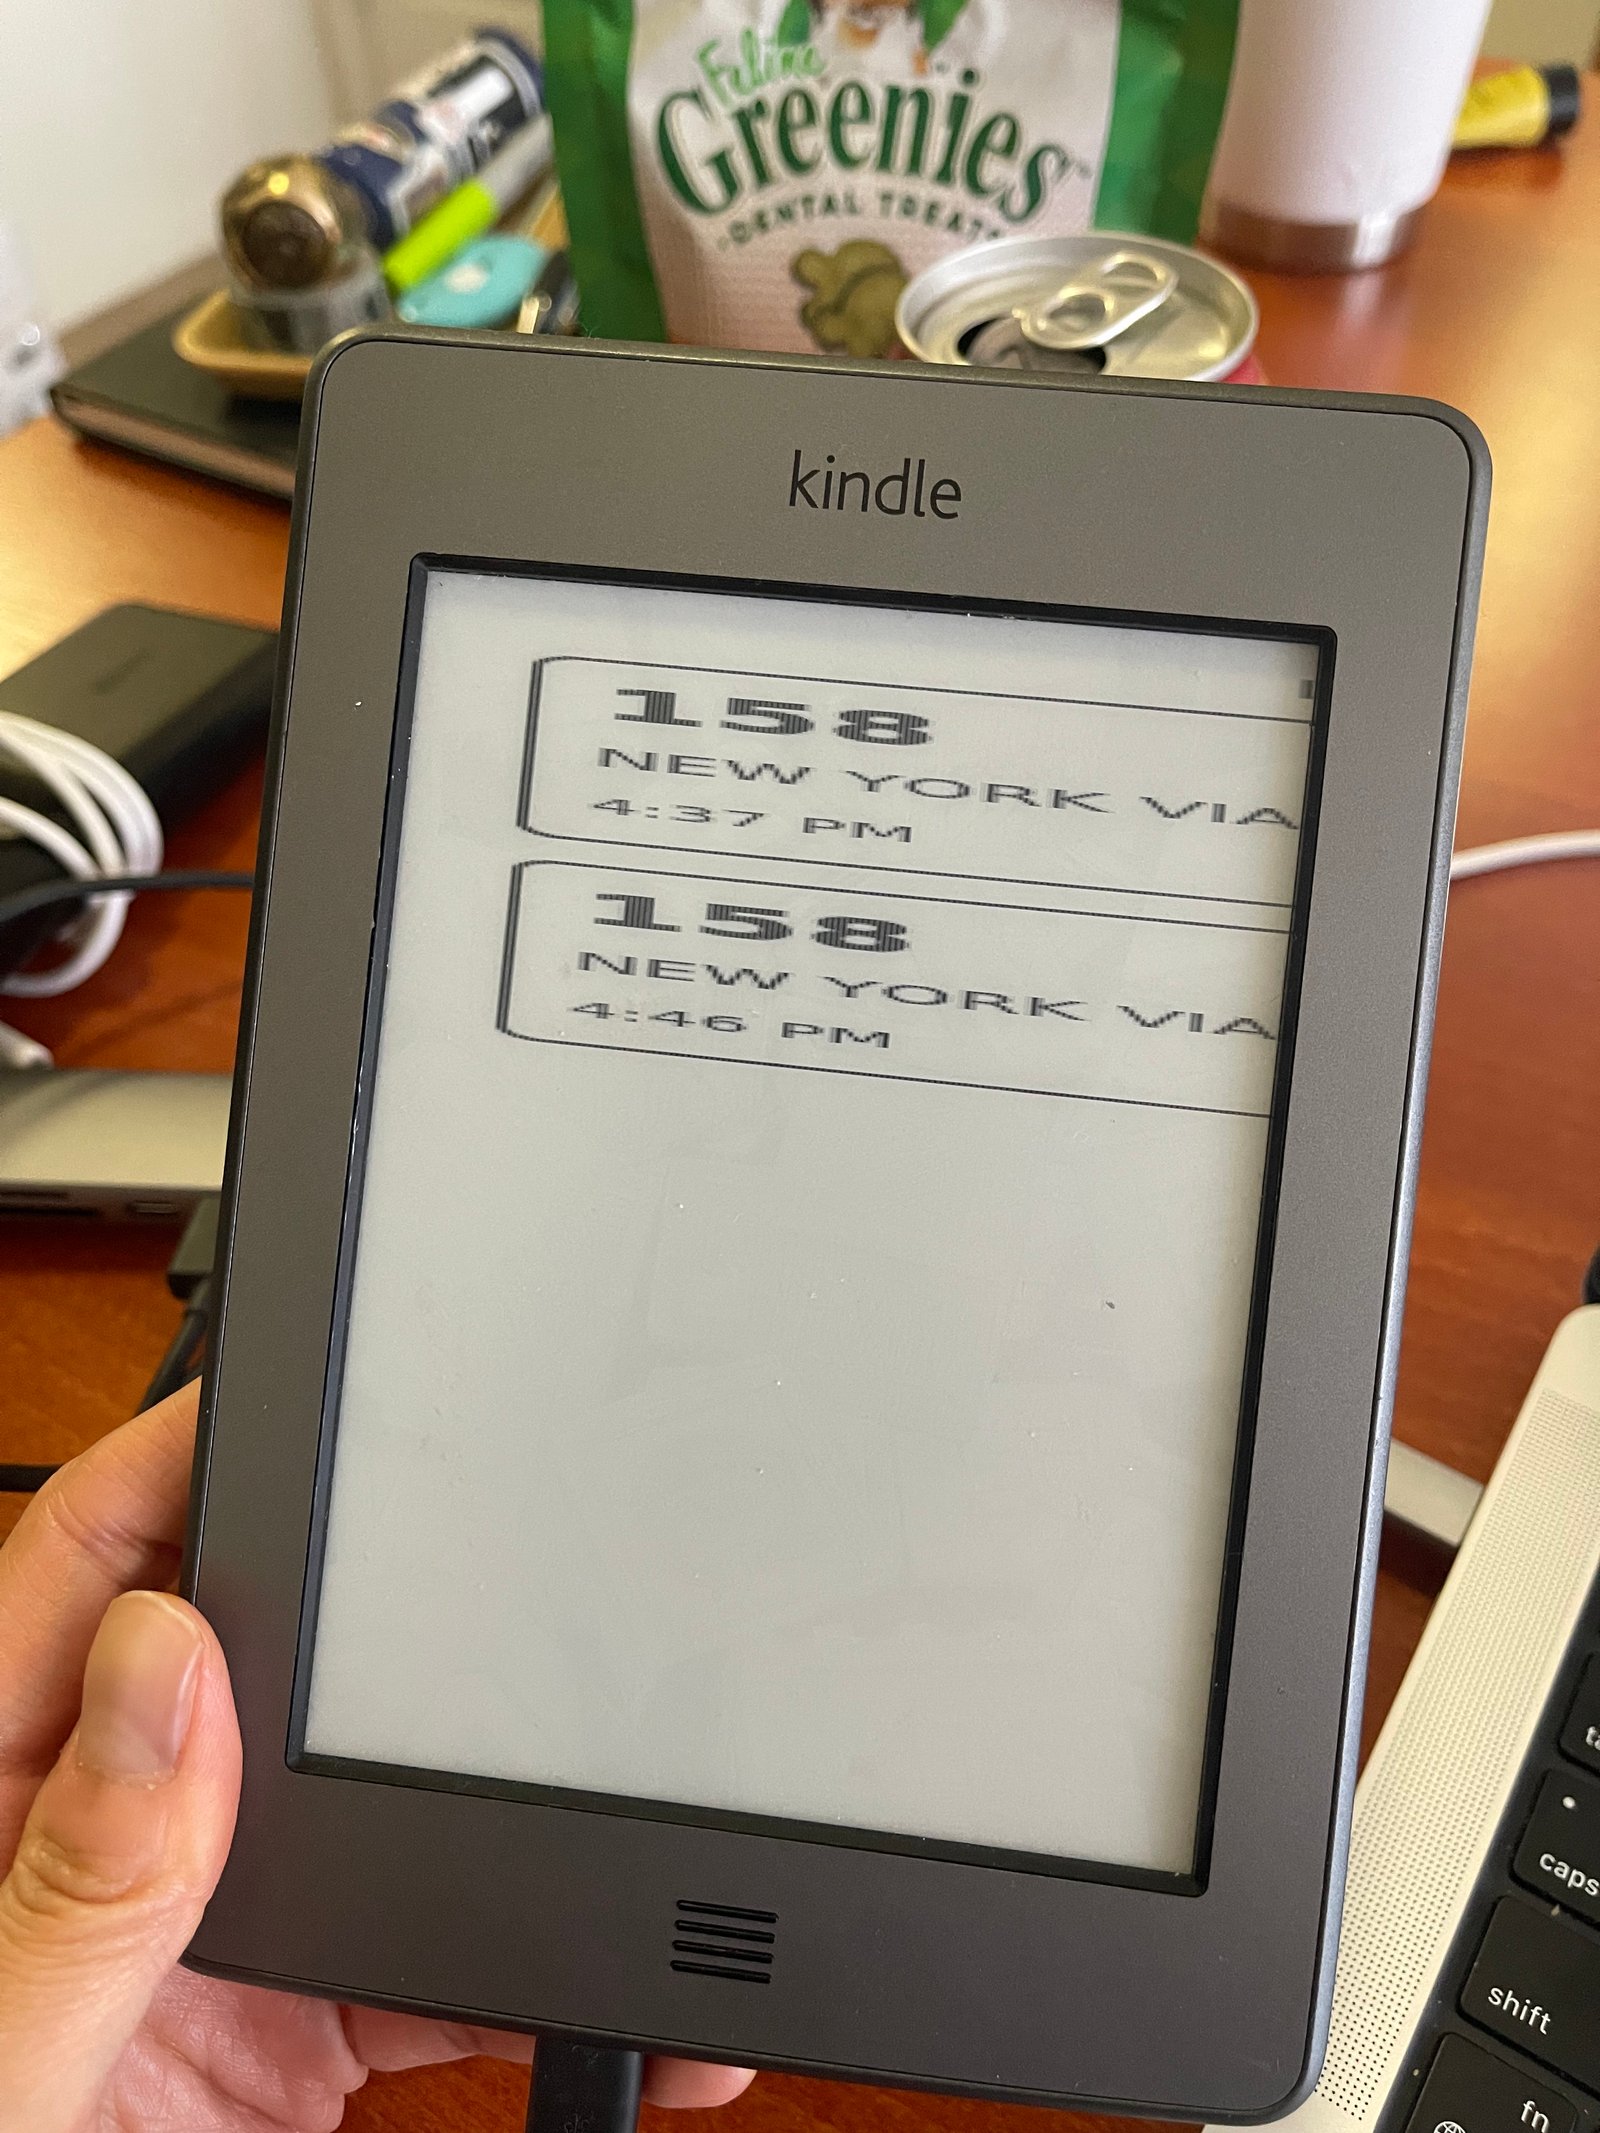
My Kindle expects a 600×800 image and the image must be rotated. Without passing a rotate command during the image generation process, I got skewed images like this:
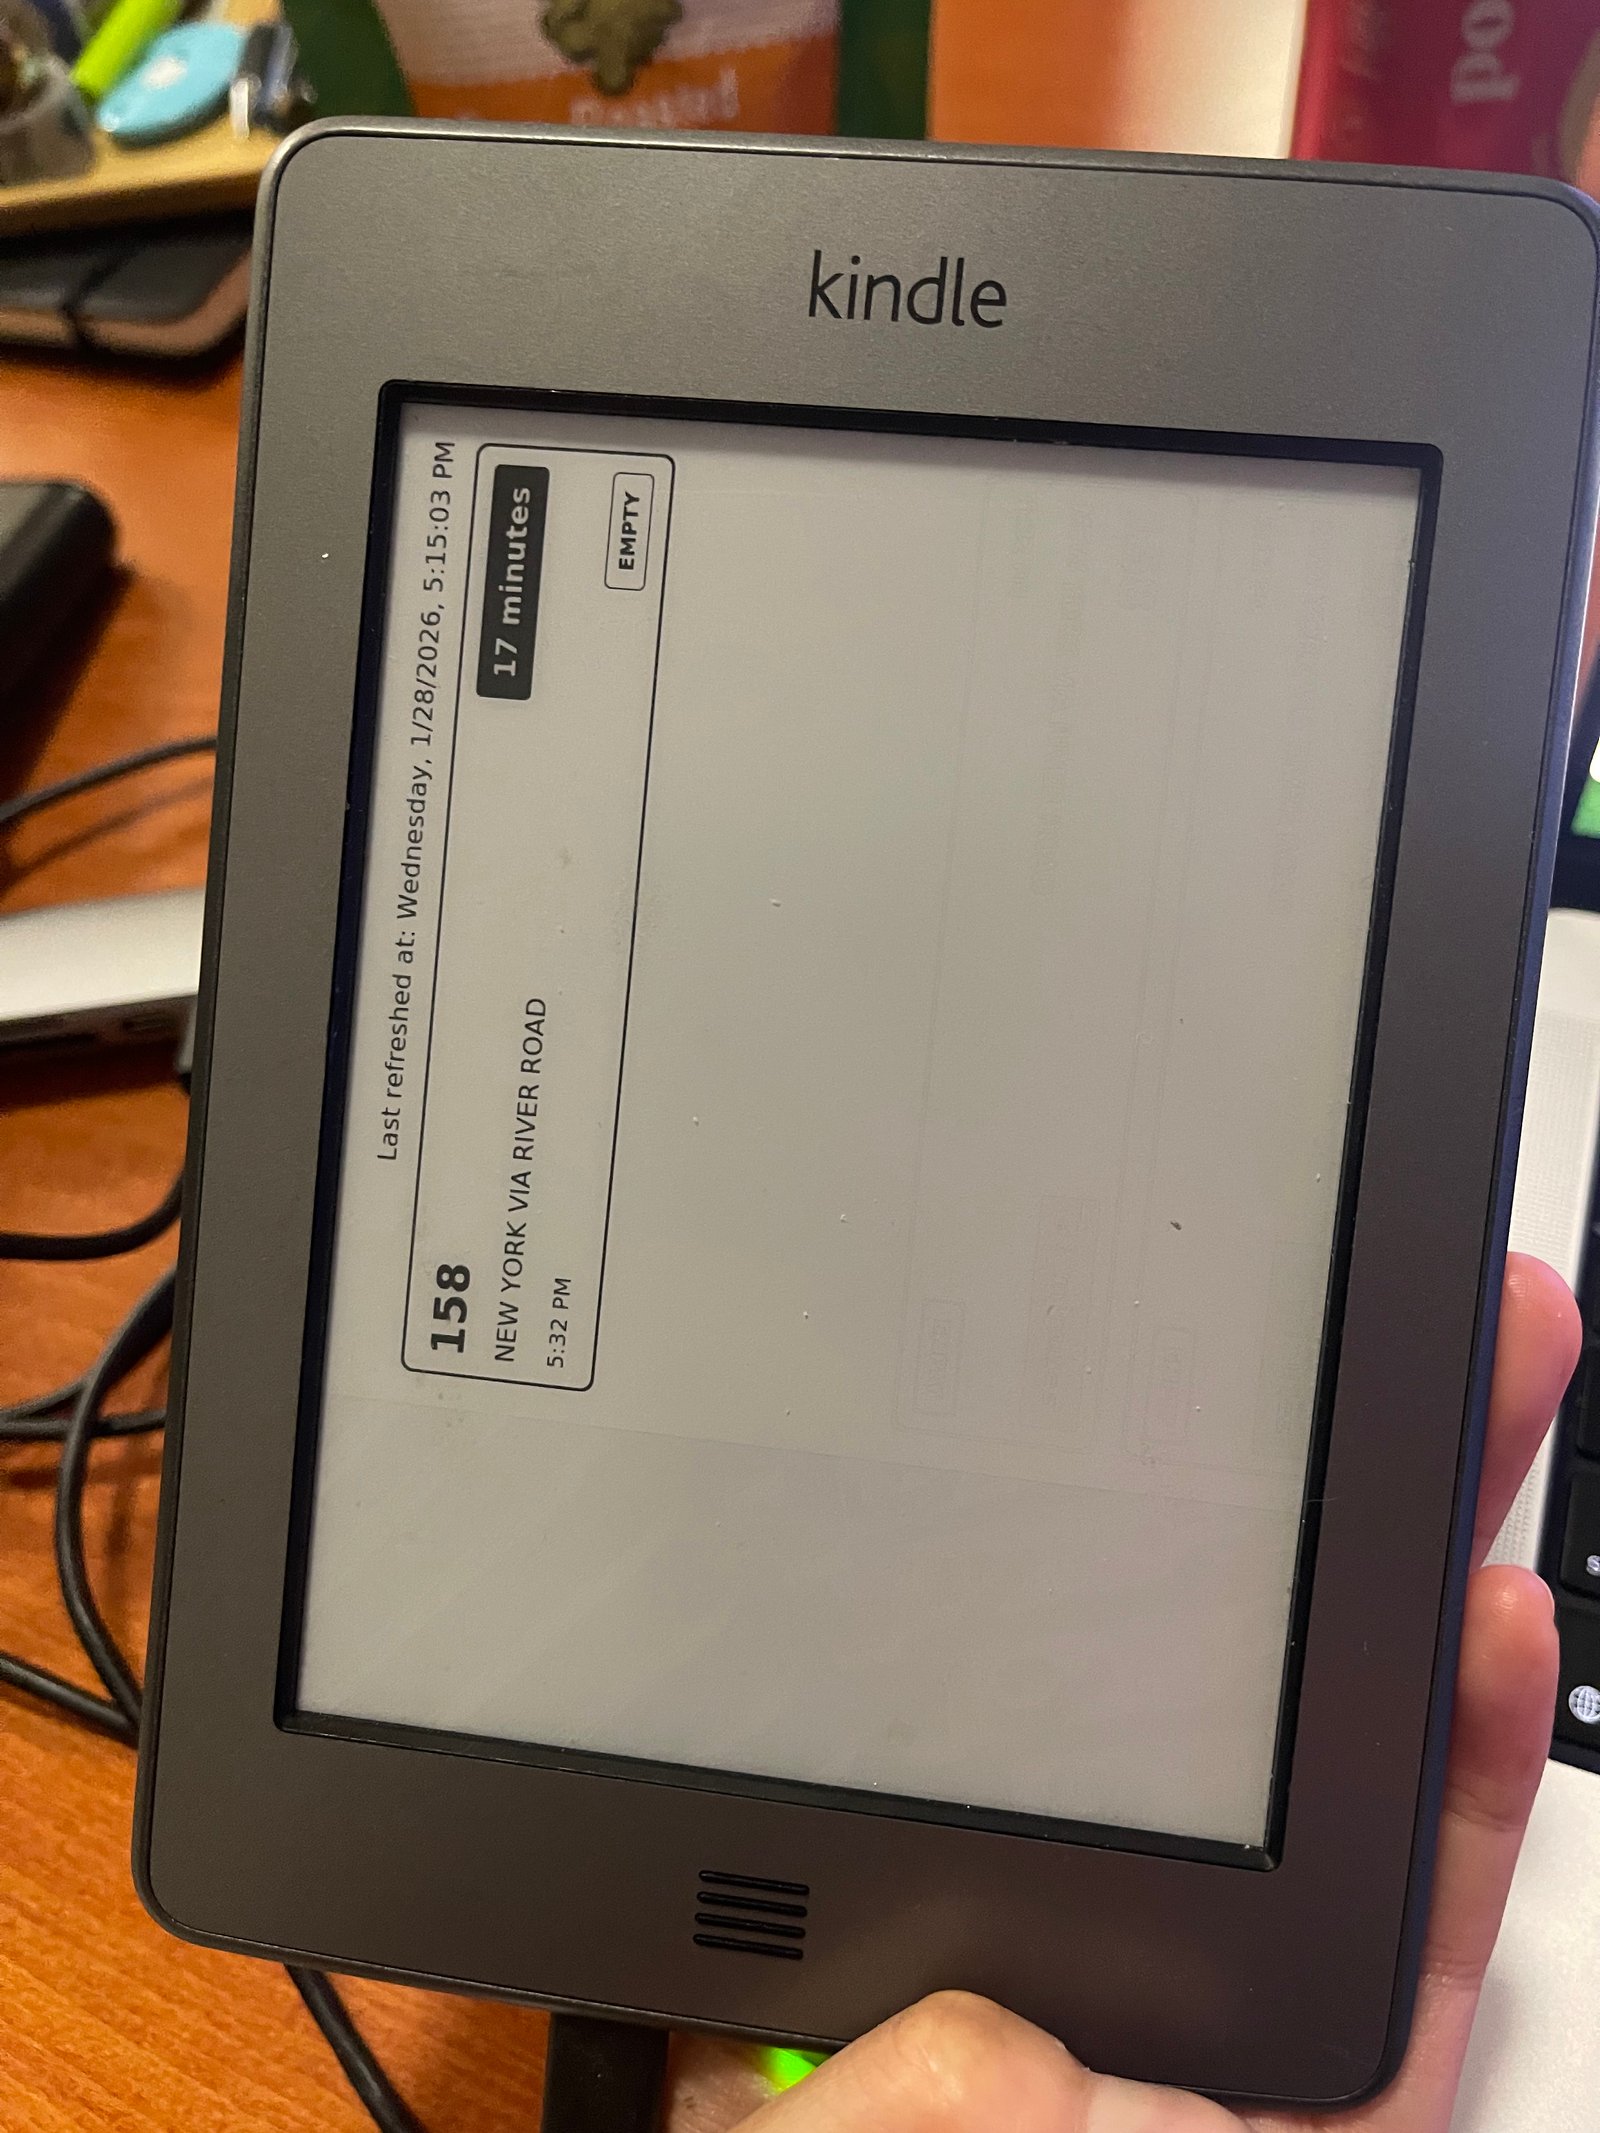
However, after rotating, the bus times could only be viewed horizontally and I wanted to mount my Kindle vertically. What that meant was I had to rotate the HTML itself. But when rotating an image then taking a snapshot, the rotation is around the center of the screen so the snapshot made by wkhtmltoimage kept on cutting off the bus times. Finally, a combination of rotate and translate gave me what I needed, which was a rotated image that was aligned to the top left of the screen:
transform: rotate(90deg) translateX(-100px) translateY(-100px);
Once you have a server with an endpoint that serves your image, you’re ready for the last step.
5. Creating a KUAL app
Going into this, I wanted two things – an easy way to exit dashboard mode and a relatively up to date bus schedule. All the guides I’ve seen thus far ran a cron on their Kindle that hit their endpoint at a specified interval. However I didn’t like this because I didn’t want the Kindle to always run the dashboard after restarts. I want to control when the dashboard is displayed and that meant creating a custom KUAL app.
The general layout is:
bin/ # executable scripts here
menu.json # controls the menu items in the KUAL dashboard
config.xml # no clue wtf this is
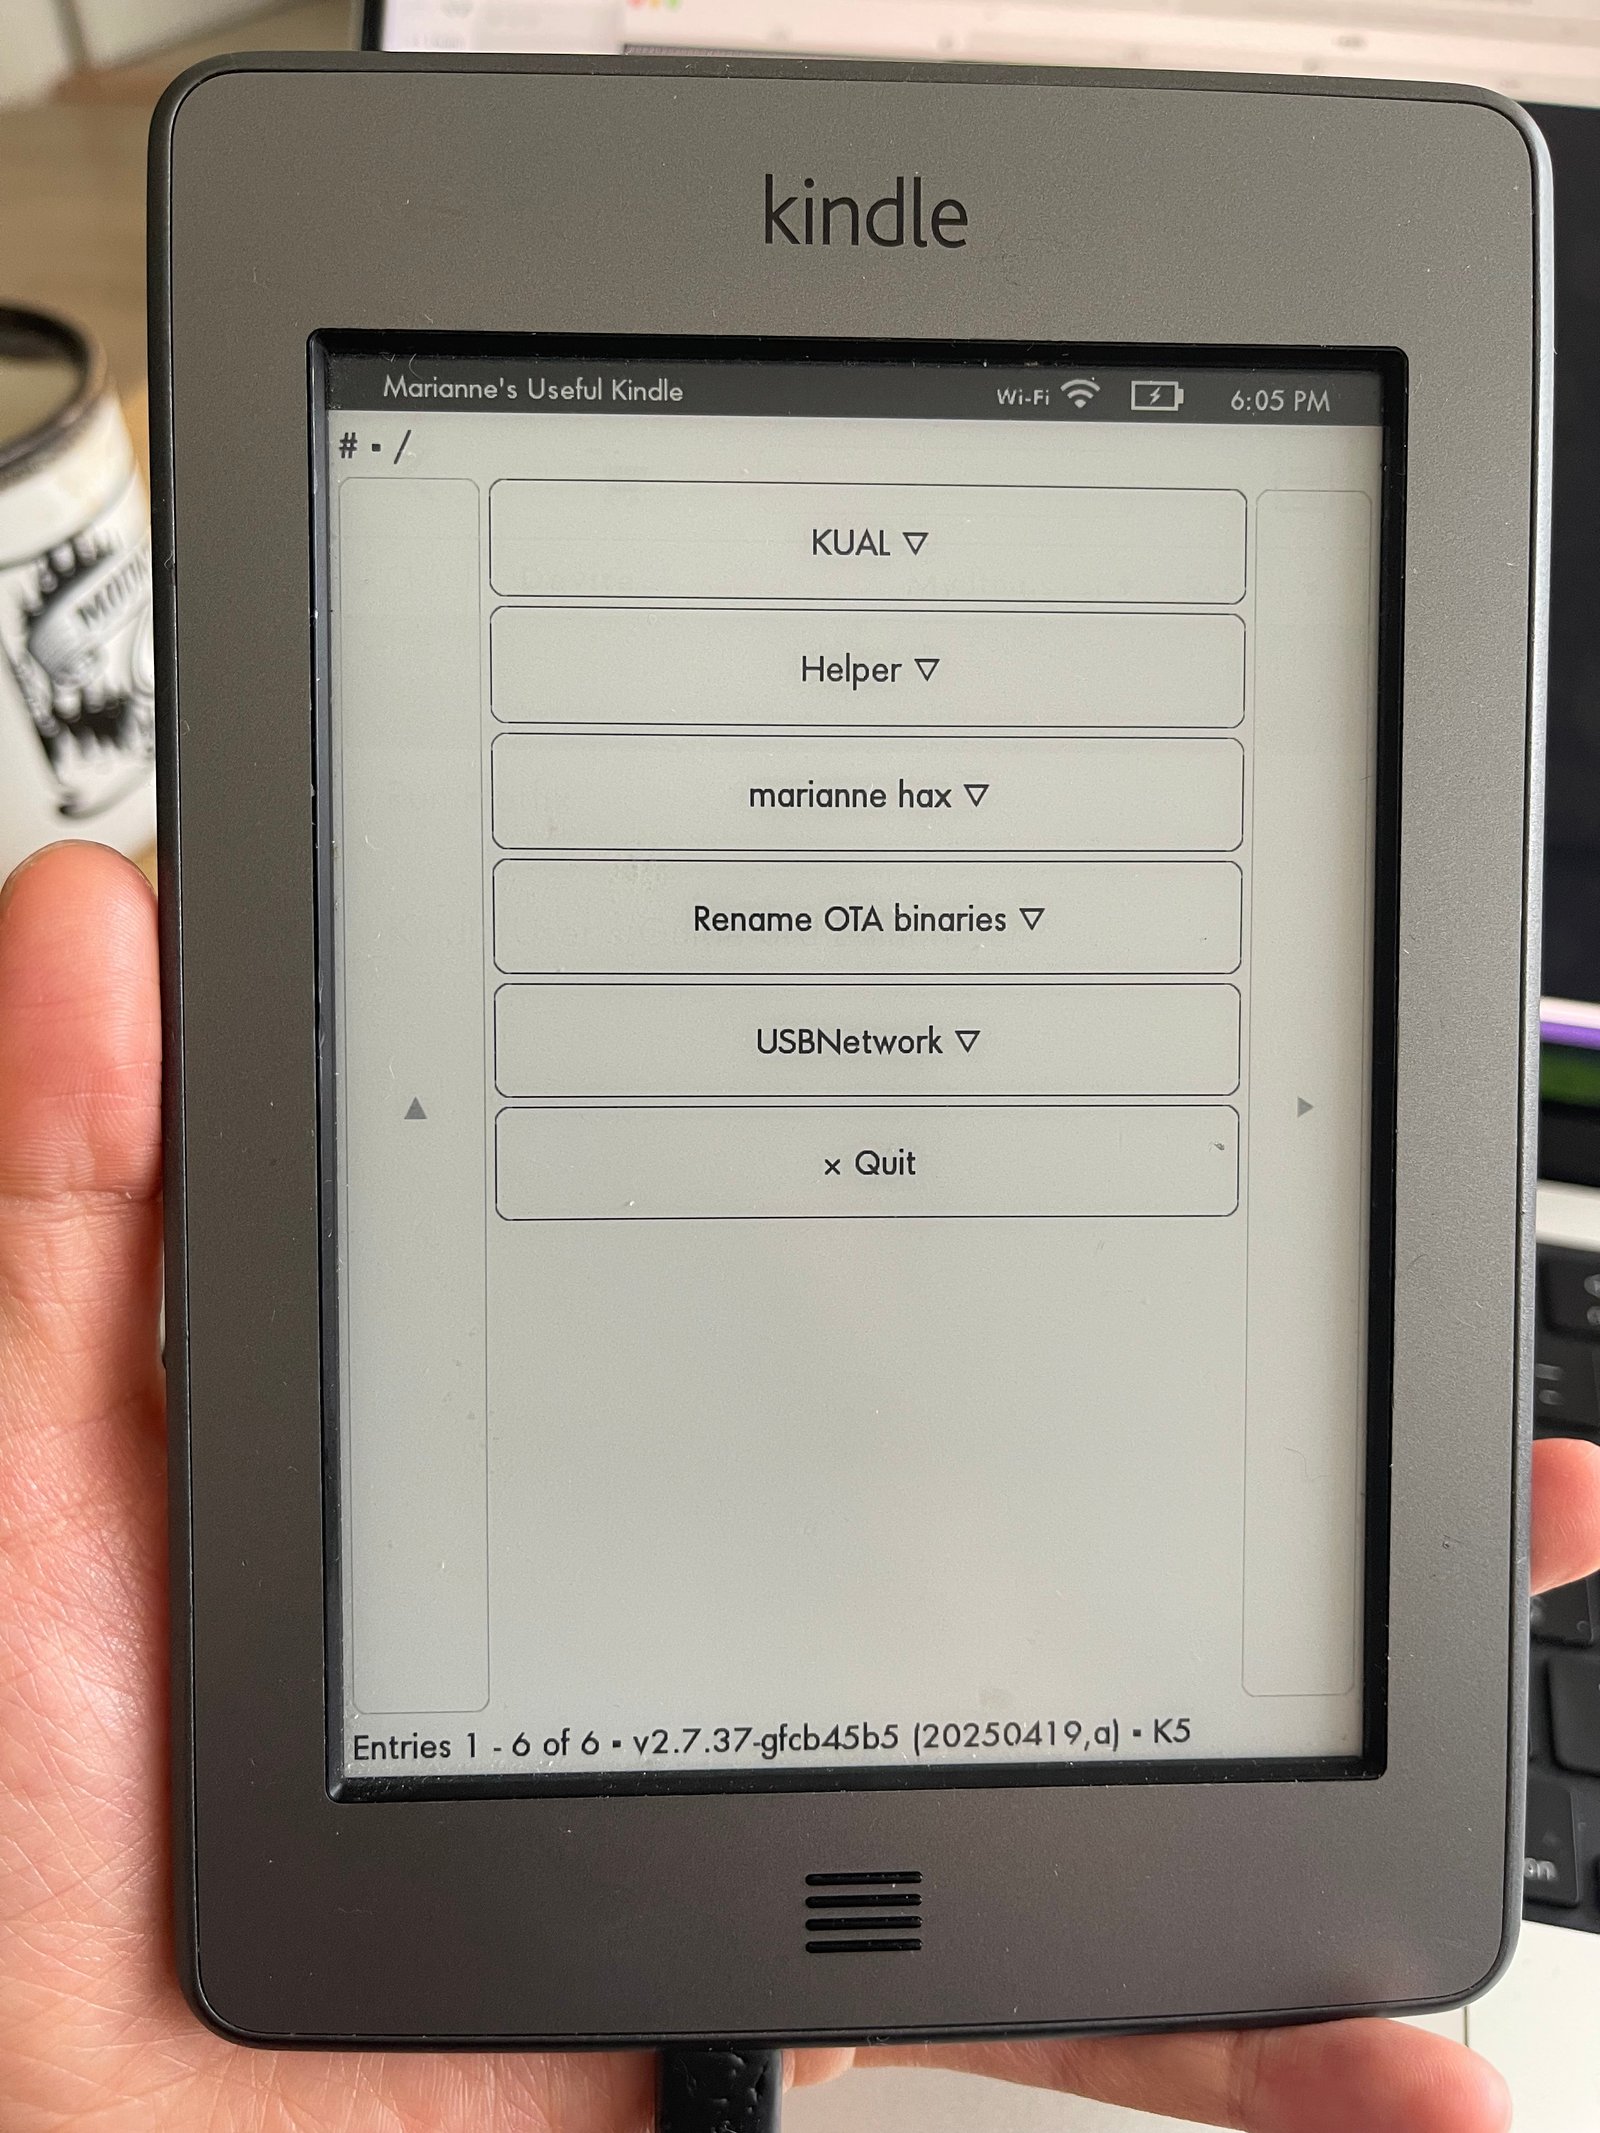
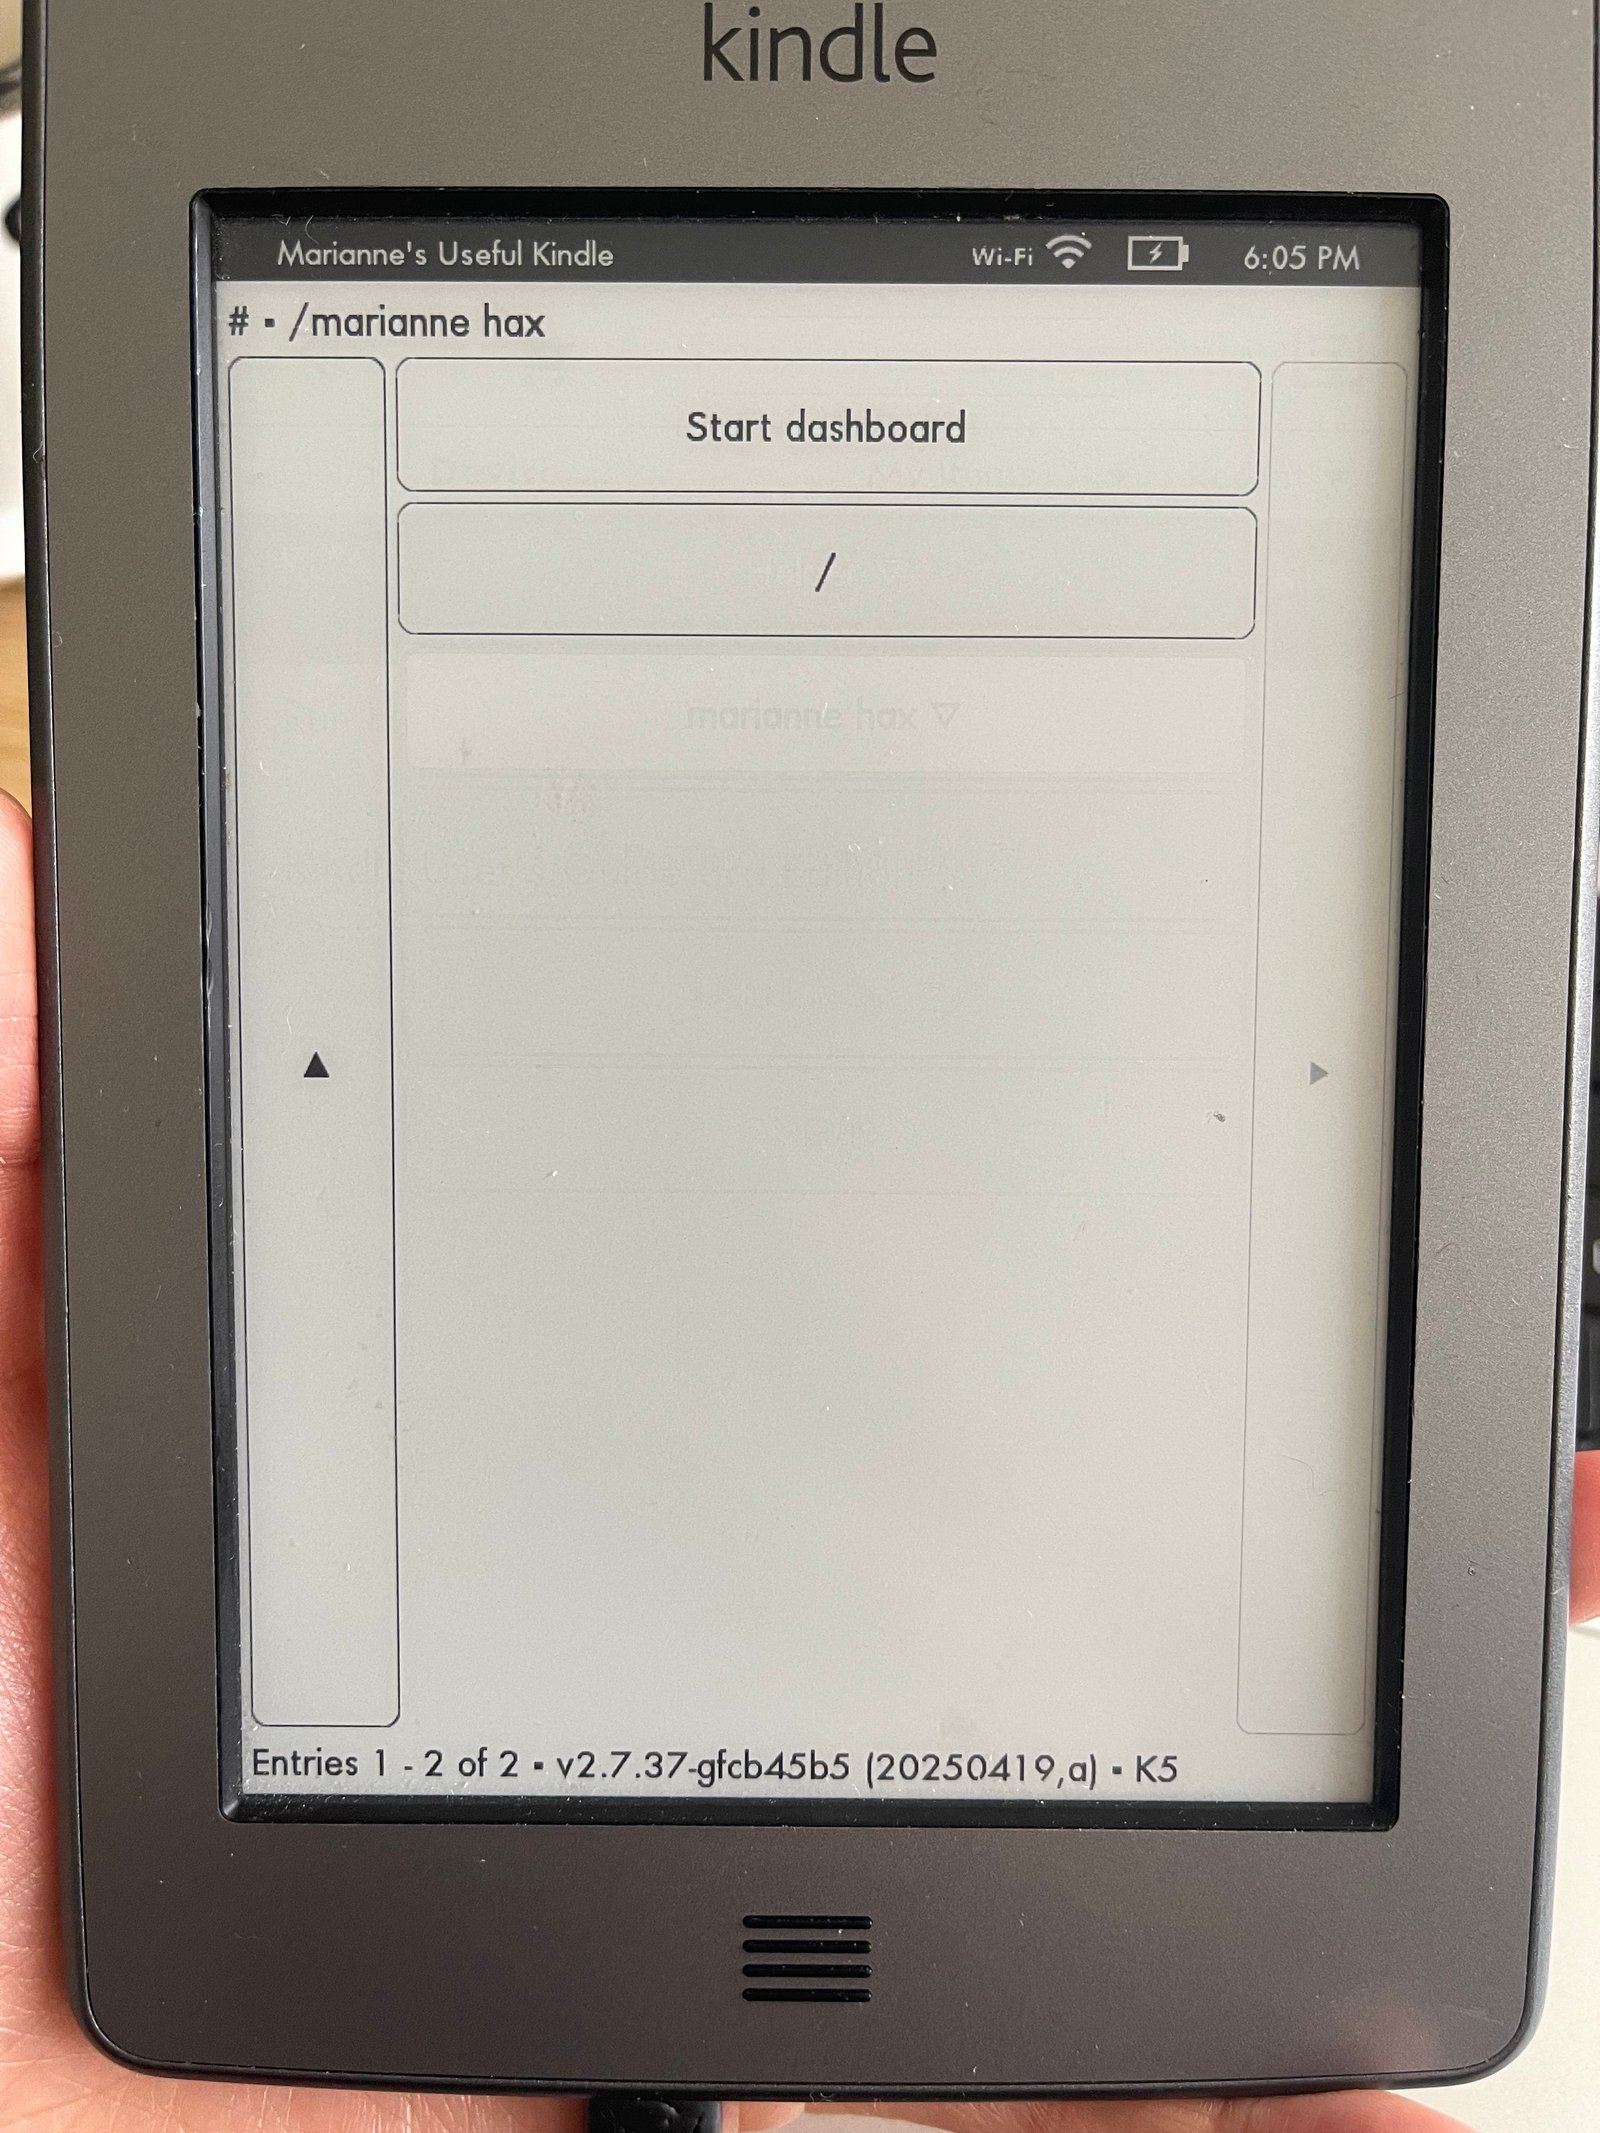
Whiled SSH-ed into your Kindle, place your custom extension folder inside of /mnt/us/extensions/. If you used my custom dash code, after restarting and launching KUAL, you’ll see your custom extension listed in KUAL and after clicking into it, a single menu item titled ‘Start dashboard’:
The dashboard start script explained
When you press ‘Start dashboard’, you can see in the menu.json that bin/start.sh will execute. The start script has comments explaining what it does. Some interesting things I’ve never worked with before:
# ignore HUP since kual will exit after pressing start, and that might kill our long running script
trap '' HUP
...
# ignore term since stopping the framework/gui will send a TERM signal to our script since kual is probably related to the GUI
trap '' TERM
...
trap - TERM
trap! Here’s a helpful resource explaining the bash trap command. The TL;DR of it is that without ignoring certain signals, the script will always early exit.
Getting rtcwake to work was also annoying. For me, calling rtcwake on the default device (skipping -d flag) never worked, I had to list possible devices then choose a different one. The one that reacted to the rtcwake command was rtc1 for me
do_night_suspend() ⚡The refresh_screen function is important. This is the whole reason we did all that server and image generation stuff earlier. It retrieves an image at an endpoint, clears the screen twice, draws the image from the server and positions it slightly lower on the screen to make room for the status bar up top. The last line displays the datetime, wifi status, and battery remaining.
refresh_screen() 💬This part of the script listens for the user pressing the menu button.
script -q -c "evtest /dev/input/event2 2>&1" /dev/null | grep -m 1 -q "code 102 (Home), value 1" && "$DIR/stop.sh"evtest is the command that worked for me for listening for incoming events on a specified device on the kindle. In my case, any time I pressed the menu button, the evtest command outputs code 102 (Home), value 1.
When the user presses the menu button, the stop.sh script is called automatically, which will kill the dashboard, clear the screen, and restart the kindle UI so that the device can be used normally.
Final Thoughts
Now that it’s been running for more than a month, 2 things I’m thinking about:
Color bleeding
Even though I clear the screen twice before rendering a new image, the color bleed is still pretty noticeable after it’s been running for a couple days. I have a theory that if I flash the screen completely black and then white again when the kindle goes to sleep at night, it’d solve the problem but haven’t tried it out yet.
Battery life
Right now it can go for ~5 days without being plugged in. I’d love for that number to be at the 2 week mark. Turning the device off for 10 hours at night extended the battery life by ~2 days, but 2 weeks is still a long ways off. I’ve debated increasing the gap between screen refreshes since it refreshes every minute right now, but I like the (almost) live minute updates so would rather sacrifice that last if possible in the quest for longer battery life.
Overall, this thing is sick! Probably one of the most fun projects I’ve built in recent memory. We use it every day before leaving the house, and it’s so much simpler than texting a stop number to an NJ Transit phone number. I can see serving up all sorts of interesting information on the e-ink screen – calendar, weather, daily tasks, sky’s the limit.
{💬|⚡|🔥} **What’s your take?**
Share your thoughts in the comments below!
#️⃣ **#Repurpose #Kindle**
🕒 **Posted on**: 1771964877
🌟 **Want more?** Click here for more info! 🌟