
🔥 Read this must-read post from Hacker News 📖
📂 **Category**:
💡 **What You’ll Learn**:
The 3D Benchy is one of the most popular test prints in the 3D printing world. At first glance, it looks like a small boat, but it is actually a smart torture test designed to reveal common printer problems.
A Benchy can help you check overhangs, bridging, holes, curved surfaces, first-layer quality, cooling, extrusion, dimensional accuracy, and motion control. This is why many makers use it after changing filament, adjusting slicer settings, upgrading hardware, or testing a new printer.
In this guide, you’ll learn the most common 3D Benchy defects, what causes them, and how to fix them.
What Is a 3D Benchy?
The 3D Benchy is a small benchmark boat designed to test the performance of FDM 3D printers. It includes several difficult features such as curved hull surfaces, unsupported holes, bridges, overhangs, fine details, and a chimney.
A standard Benchy is usually printed at 1:1 scale with a 0.4 mm nozzle, 0.2 mm layer height, around 10% infill, and moderate print speed. These baseline settings make it useful for comparing print quality between different machines and slicer profiles.
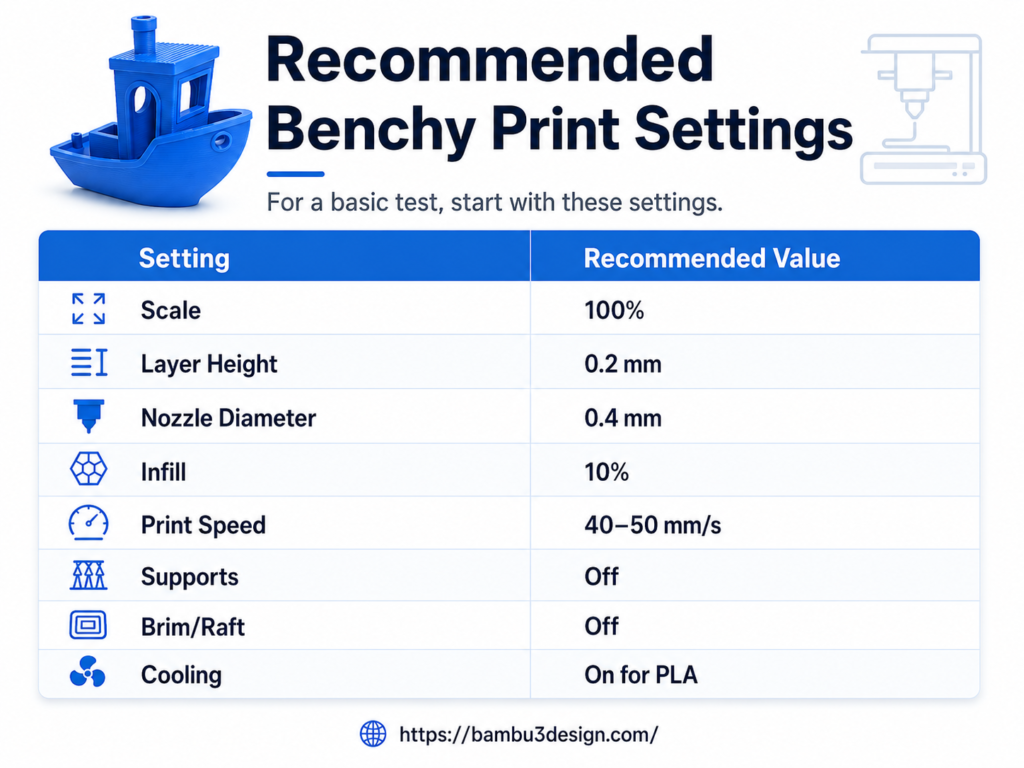
Do not use supports for Benchy. The point of the model is to reveal how well your printer handles difficult features on its own.
1. Stringing / Oozing

What it looks like
Thin hair-like strings appear between the cabin walls, chimney, door frame, or small gaps.
Common causes
Stringing usually happens when molten filament leaks from the nozzle during travel moves. The most common causes are poor retraction settings, nozzle temperature too high, wet filament, or slow travel speed.
How to fix it
Increase retraction distance or retraction speed slightly, lower the nozzle temperature by 5–10°C, dry your filament, and increase travel speed if your printer can handle it.
2. Over-Extrusion
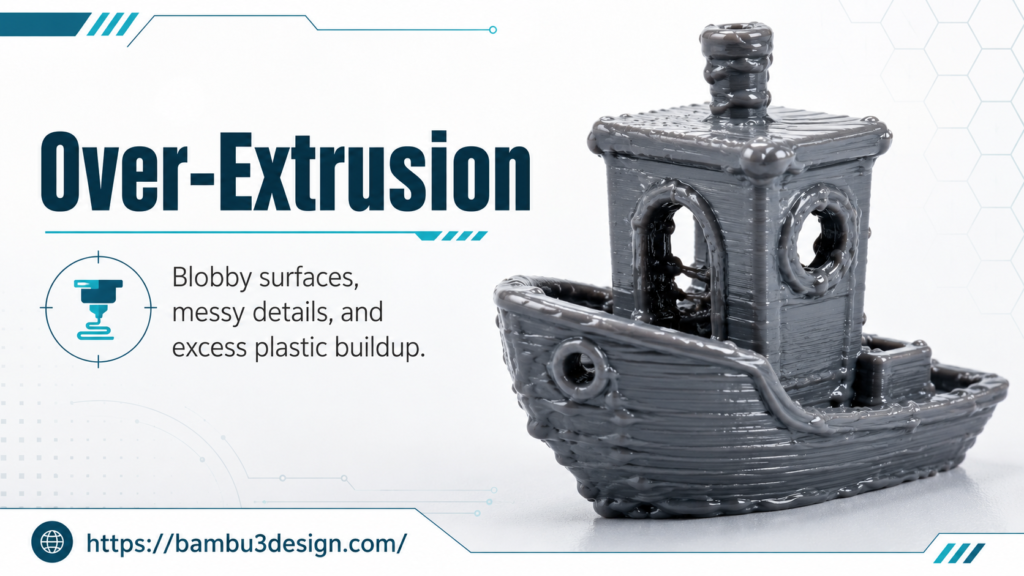
What it looks like
The hull looks blobby, the cabin details are messy, and there may be extra plastic around corners or small features.
Common causes
Over-extrusion happens when the printer pushes out too much filament. This can be caused by an incorrect flow rate, wrong filament diameter, or poorly calibrated extruder steps.
How to fix it
Calibrate E-steps, check filament diameter in the slicer, reduce flow rate by small steps, and make sure your slicer profile matches the filament you are using.
3. Under-Extrusion
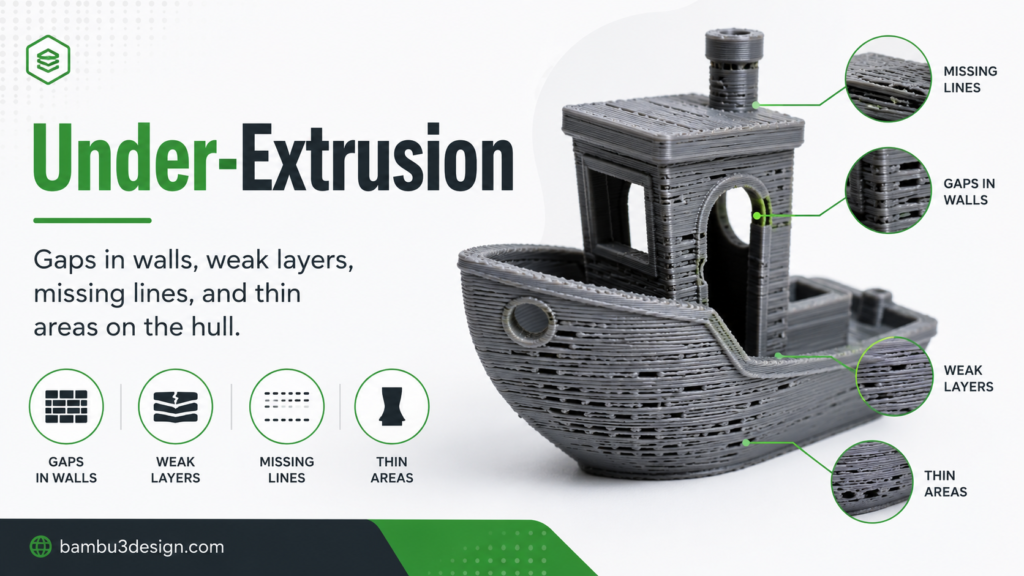
What it looks like
You may see gaps in the walls, weak layers, missing lines, or thin areas on the hull.
Common causes
Under-extrusion can come from a clogged nozzle, low nozzle temperature, incorrect E-steps, poor filament feeding, loose extruder tension, or a worn PTFE tube. Benchy’s hull is especially useful for spotting thin layers and inconsistent extrusion.
How to fix it
Clean the nozzle, raise nozzle temperature slightly, check extruder tension, calibrate E-steps, and make sure the filament path is smooth.
4. Warping
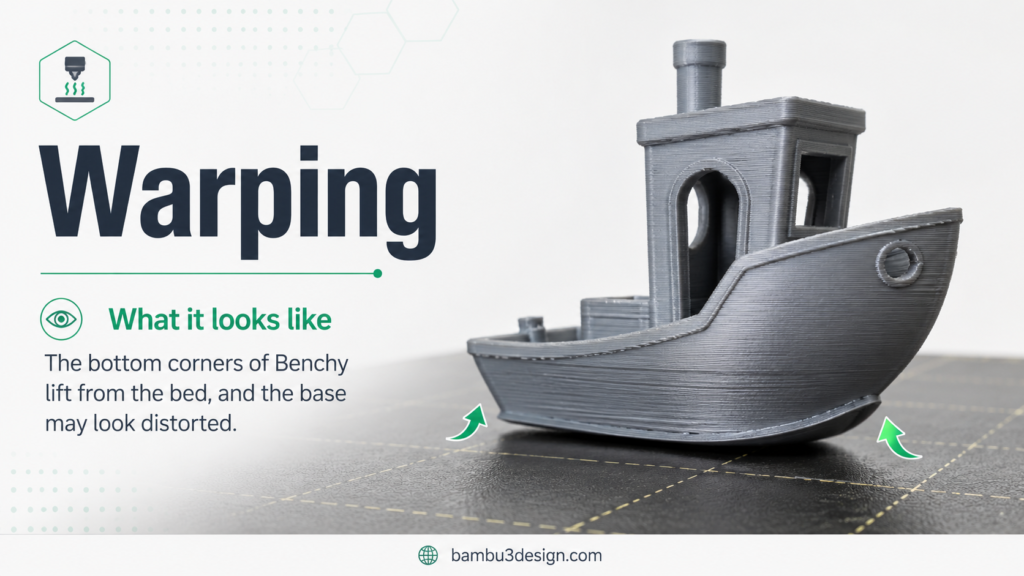
What it looks like
The bottom corners of Benchy lift from the bed, and the base may look distorted.
Common causes
Warping usually happens when the first layer does not stick well or when the print cools too quickly. ABS, ASA, and Nylon are more likely to warp than PLA.
How to fix it
Clean the build plate, increase bed temperature, use a brim if needed, reduce drafts, and use an enclosure for materials that shrink more during cooling.
5. Layer Shifting
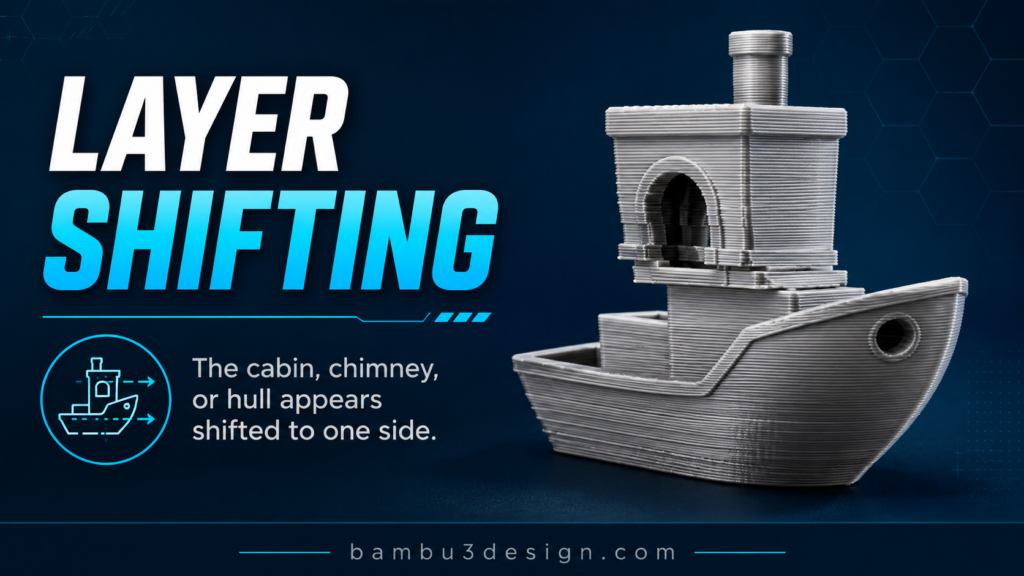
What it looks like
The cabin, chimney, or hull appears shifted to one side. The model may look like it has been pushed sideways.
Common causes
Layer shifting often comes from loose belts, pulley issues, mechanical obstruction, stepper driver overheating, or print speed that is too high. Benchy can reveal both horizontal shifts and smaller vertical inconsistencies.
How to fix it
Tighten belts, check pulleys, make sure the print head moves smoothly, reduce speed and acceleration, and improve cooling around electronics if needed.
6. Poor Bridging
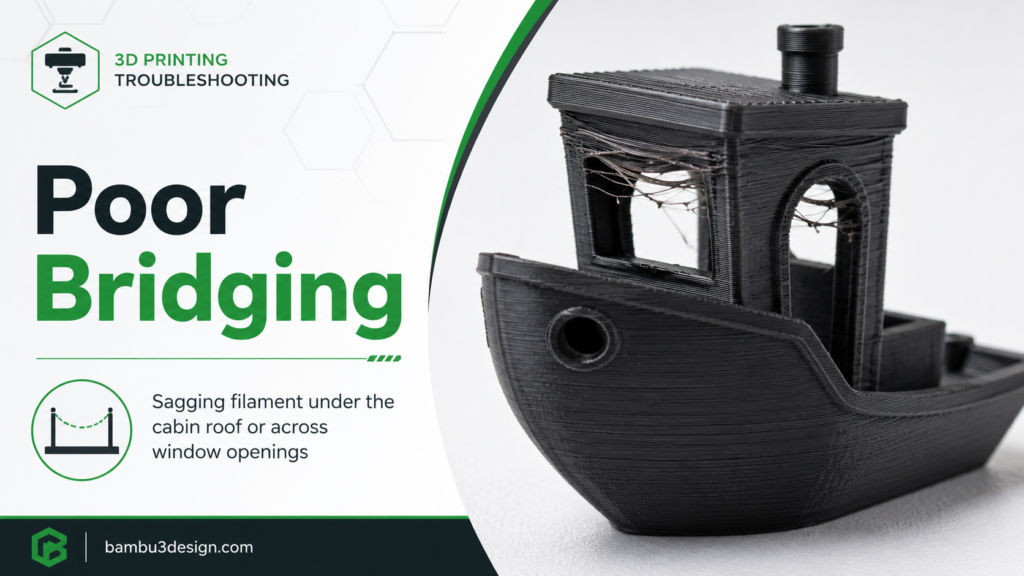
What it looks like
The filament sags under the roof of the cabin or across window openings.
Common causes
Poor bridging is usually caused by insufficient part cooling, print temperature too high, or bridge speed that is not tuned correctly.
How to fix it
Increase part cooling fan speed, lower nozzle temperature slightly, reduce bridge speed, and make sure the cooling duct points correctly at the printed part.
7. Overhang Issues

What it looks like
Edges under the cabin roof, bow, or overhanging areas droop downward.
Common causes
Overhang problems happen when the plastic does not cool fast enough before the next layer is added. High temperature, low fan speed, and fast printing can make this worse.
How to fix it
Improve part cooling, reduce print temperature, slow down overhang speed, and use a lower layer height if needed.
8. Z-Banding / Ribbing

What it looks like
Horizontal ripple lines appear along the hull or chimney.
Common causes
Z-banding is often related to inconsistent Z-axis movement, bent lead screws, poor lubrication, loose couplers, or mechanical wobble.
How to fix it
Check Z-rod straightness, clean and lubricate lead screws, tighten couplers, inspect the frame, and make sure the Z-axis moves smoothly.
9. Ghosting / Ringing
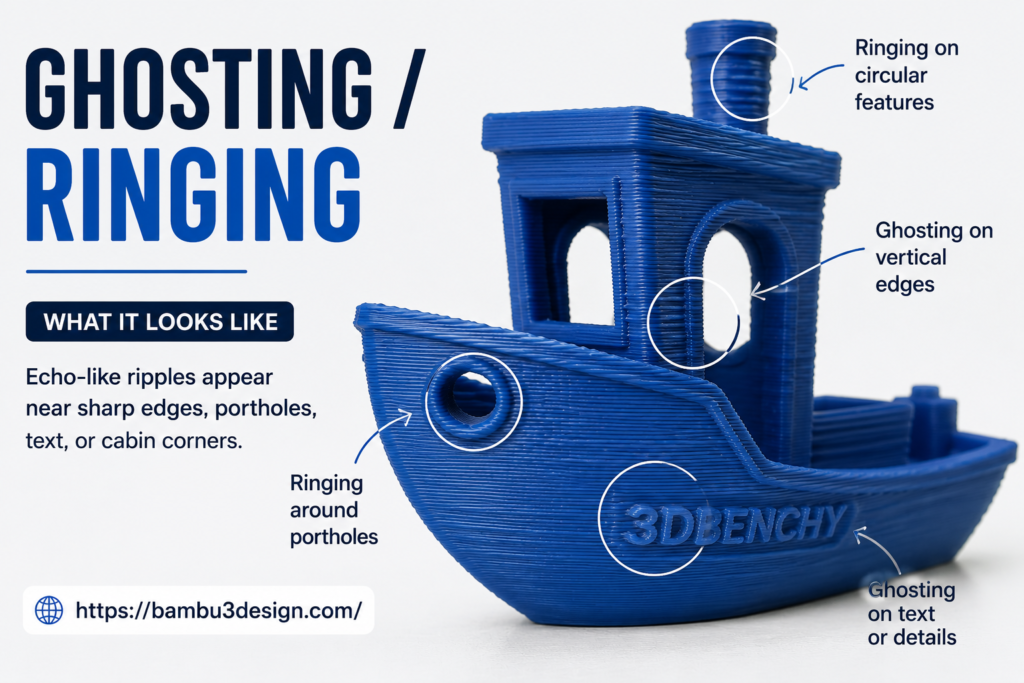
What it looks like
Echo-like ripples appear near sharp edges, portholes, text, or cabin corners.
Common causes
Ghosting and ringing are caused by vibration. High print speed, high acceleration, loose belts, unstable printer frames, and heavy print heads can all make it worse. Repeated wave patterns on Benchy’s hull are a common sign of vibration or loose mechanical parts.
How to fix it
Reduce print speed and acceleration, tighten belts, place the printer on a stable surface, check frame screws, and use input shaping if your firmware supports it.
10. Top Layer Infill Gaps
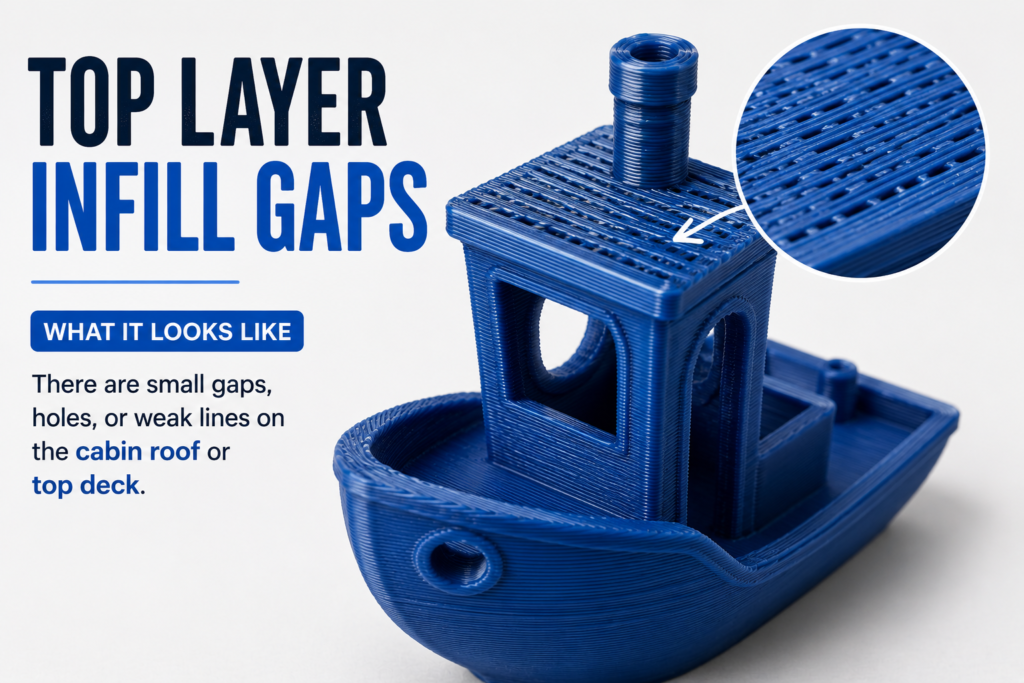
What it looks like
There are small gaps, holes, or weak lines on the cabin roof or top deck.
Common causes
This usually happens when there are too few top layers, under-extrusion, low infill overlap, or poor flow calibration.
How to fix it
Increase top solid layers, increase infill percentage slightly, calibrate flow, and increase infill overlap if needed.
11. Elephant’s Foot
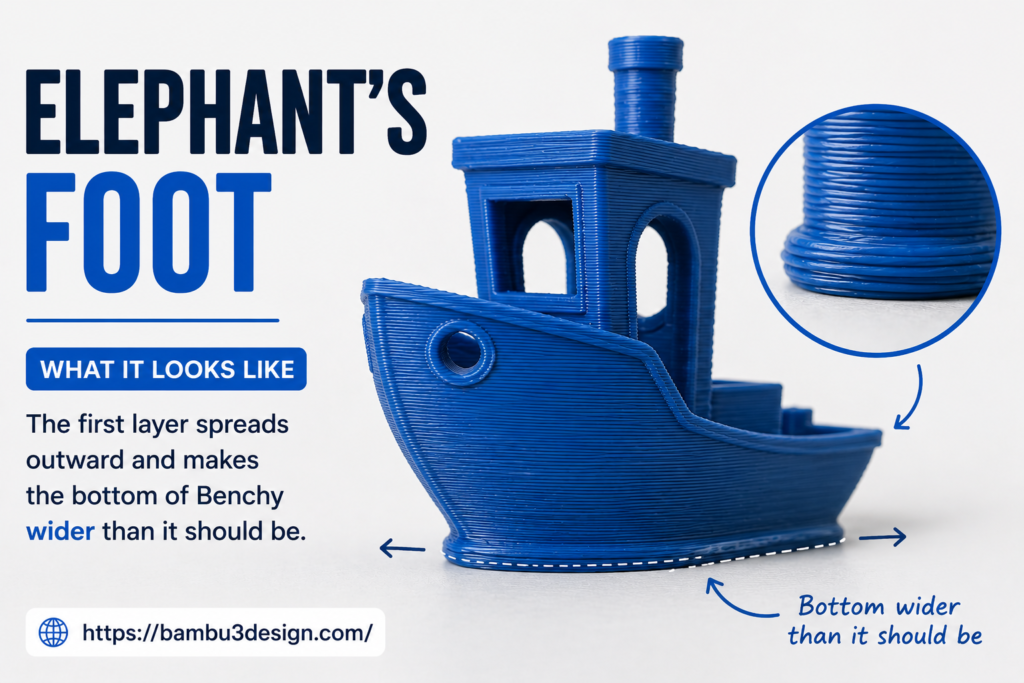
What it looks like
The first layer spreads outward and makes the bottom of Benchy wider than it should be.
Common causes
Elephant’s foot usually happens when the bed is too hot, the nozzle is too close to the bed, or the first layer is over-compressed. If it appears unevenly, bed leveling may also be part of the problem.
How to fix it
Lower bed temperature slightly, adjust Z-offset, reduce first-layer flow, and make sure the bed is level.
12. Dimensional Inaccuracy
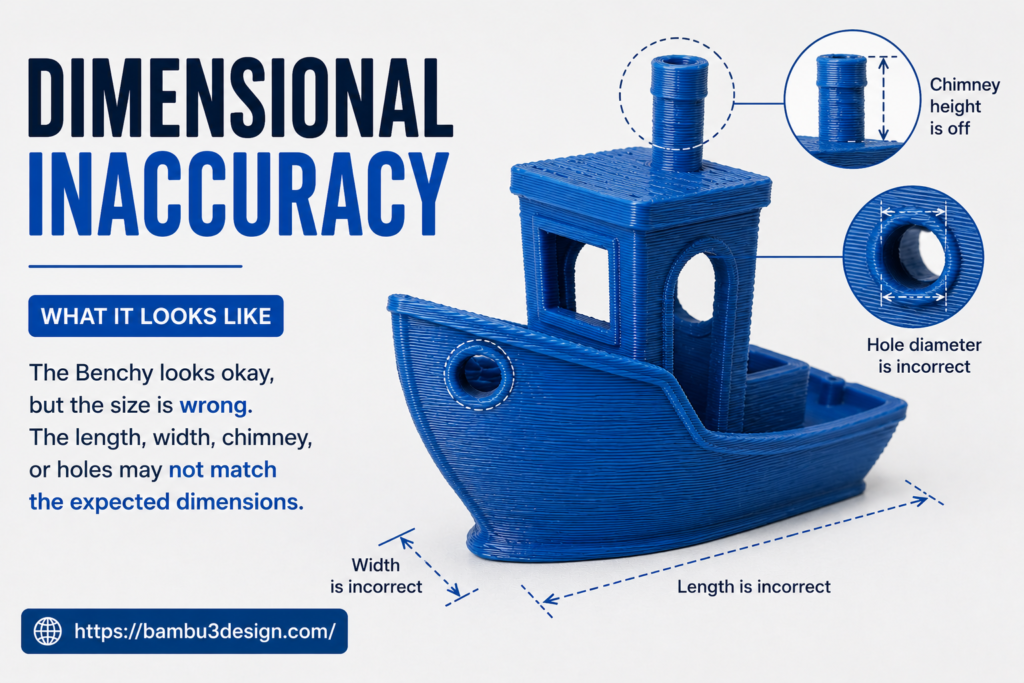
What it looks like
The Benchy looks okay, but the size is wrong. The length, width, chimney, or holes may not match the expected dimensions.
Common causes
Dimensional errors usually come from incorrect steps/mm, slicer scaling, belt tension problems, or shrinkage during cooling. The standard Benchy is 60 mm long, about 31 mm wide, and 48 mm tall, so it should be checked with calipers, not just by eye.
How to fix it
Measure the print with calipers, calibrate X/Y/Z steps if needed, check belt tension, confirm slicer scale is 100%, and test with the same filament after changes.
13. Surface Roughness
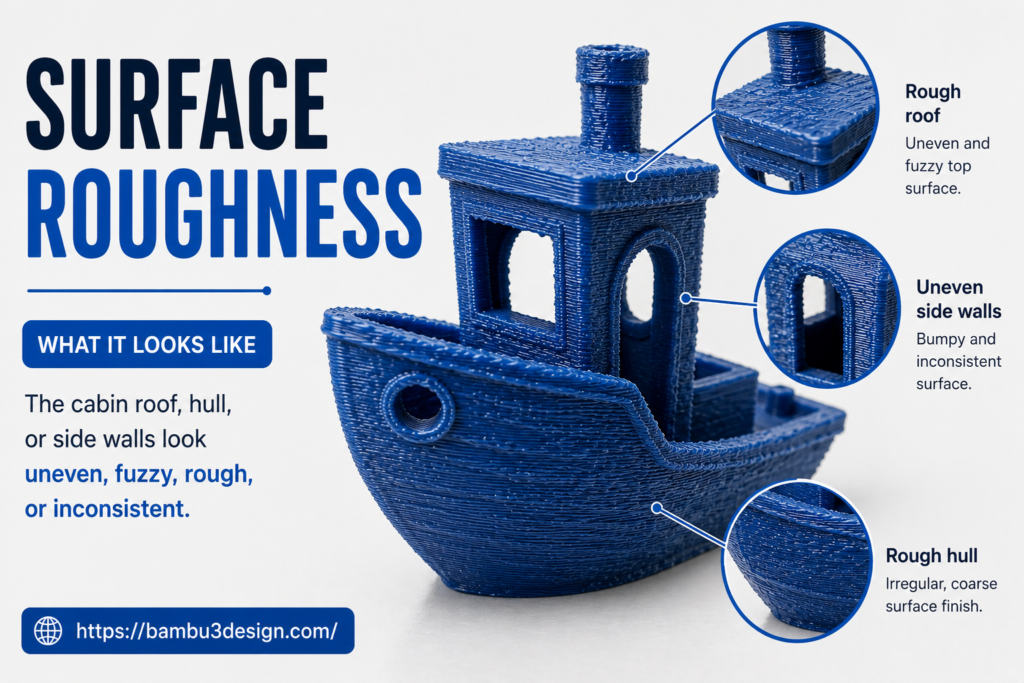
What it looks like
The cabin roof, hull, or side walls look uneven, fuzzy, rough, or inconsistent.
Common causes
Surface roughness can come from inconsistent extrusion, wet filament, cooling problems, temperature too high, poor filament quality, or mechanical vibration.
How to fix it
Dry the filament, reduce nozzle temperature, improve cooling, clean the nozzle, slow down the print, and check that the filament diameter is consistent.
How to Inspect Your Benchy Properly
Start by looking at the overall shape. A good Benchy should look like a clean boat with smooth curves, readable details, and no obvious layer shifts.
Then check these areas:
Hull
The hull should feel smooth and rounded. Blobs, waves, gaps, or repetitive patterns usually point to extrusion or motion problems.
Underside
Flip the Benchy over and inspect the first layer. The bottom should be smooth, with readable text and no excessive squishing.
Cabin windows
The window tops should be clean and straight. Sagging here usually means poor bridging or weak cooling.
Chimney
The chimney should be round and vertical. If it looks oval, your X/Y calibration may be off. If it looks melted or leaning, cooling may be insufficient.
Dimensions
Use calipers to check the length, width, and height. Visual inspection is helpful, but measurement reveals calibration issues that are easy to miss.
Final Thoughts
A 3D Benchy is more than a cute little boat. It is a compact diagnostic tool that can reveal extrusion problems, cooling issues, mechanical vibration, bed adhesion problems, dimensional errors, and slicer tuning mistakes.
If your Benchy does not look perfect, do not panic. Use each defect as a clue. Change one setting at a time, print again, and compare the results. With careful tuning, your Benchy can help you improve not only one test print, but every future print from your machine.
Happy Printing!
💬 **What’s your take?**
Share your thoughts in the comments below!
#️⃣ **#Common #Benchy #Problems #Fixes #Bambu3Design #Printing #Design**
🕒 **Posted on**: 1783252027
🌟 **Want more?** Click here for more info! 🌟